


群暉 套件 Virtual Machine Manager 安裝 OpenWrt 設置軟 路由器 ,分擔硬 路由器 工作。
此流程以單網卡旁 路由器 ,使用 Virtual Machine Manager 預設 Default VM Network 網路卡。
此流程對原架構影響較小,還原也較方便,只需將旁 路由器 關閉,並將主 路由器 重新啟動即可。
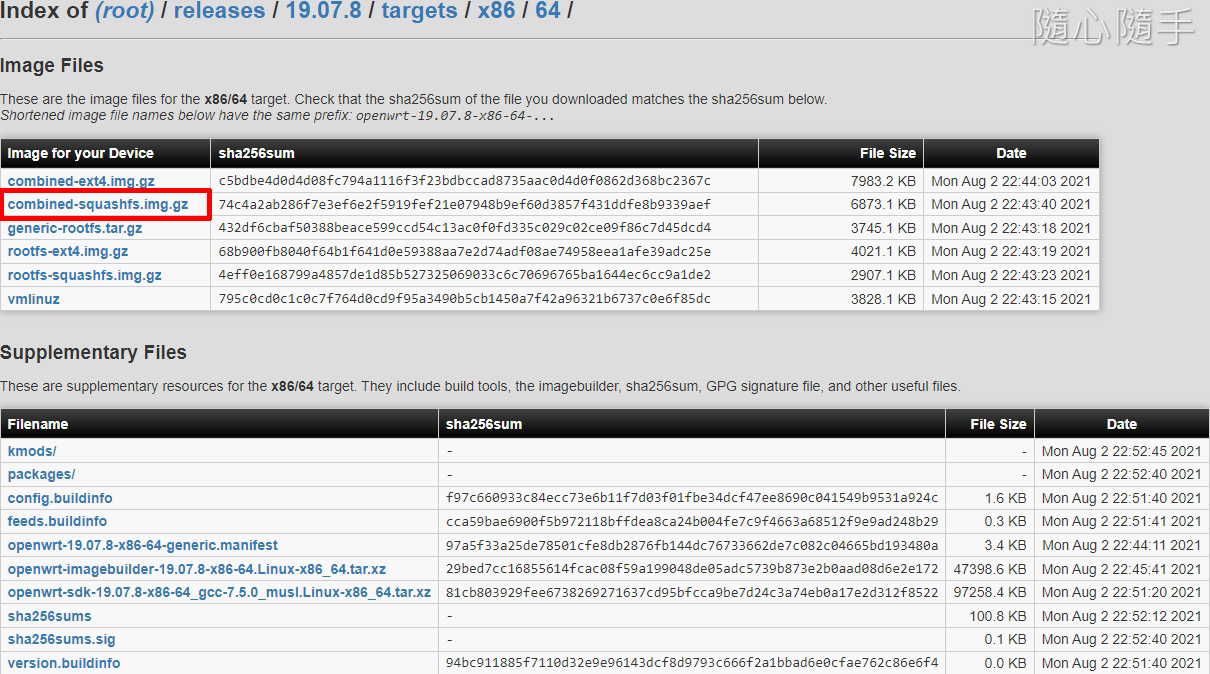
下載 OpenWrt 映像檔
前往官網\點選版本\ targets \ x86\64\ combined-squashfs.img.gz 。
解壓縮取得 img 檔。
詳細 img 版本差異,請參考官網指南。
Virtual Machine Manager 佈署
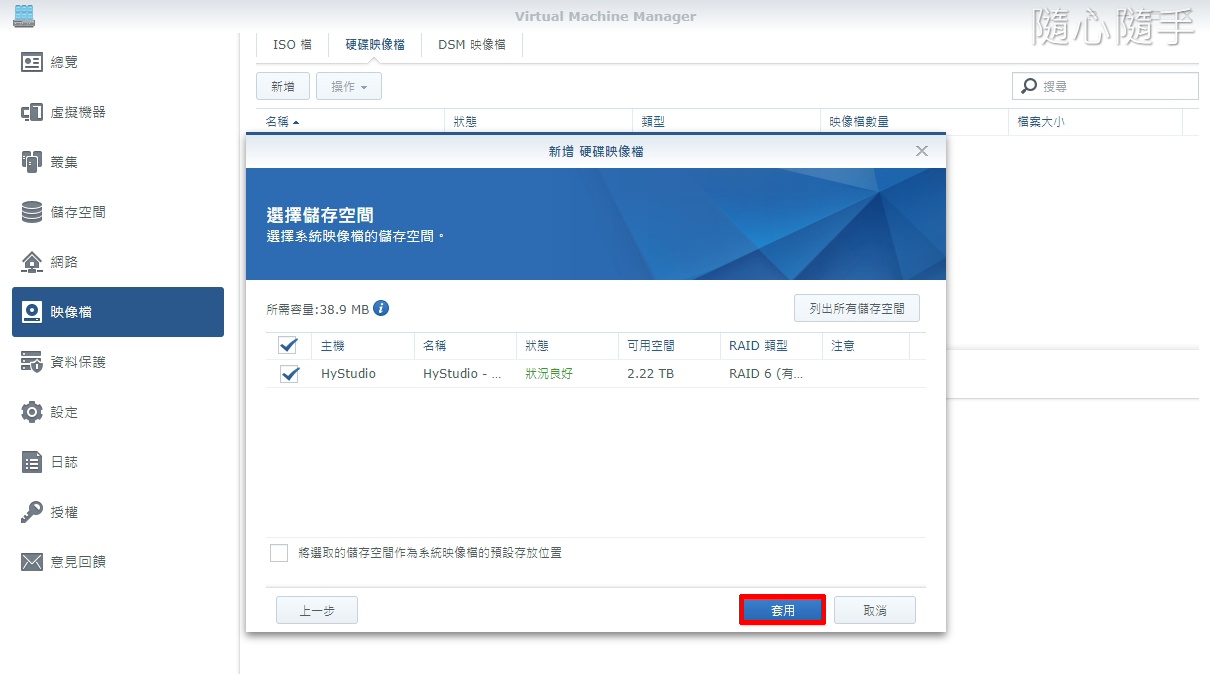
Virtual Machine Manager \映像檔\硬碟映像檔\新增\電腦上傳\剛解壓縮的 img 檔\下一步。
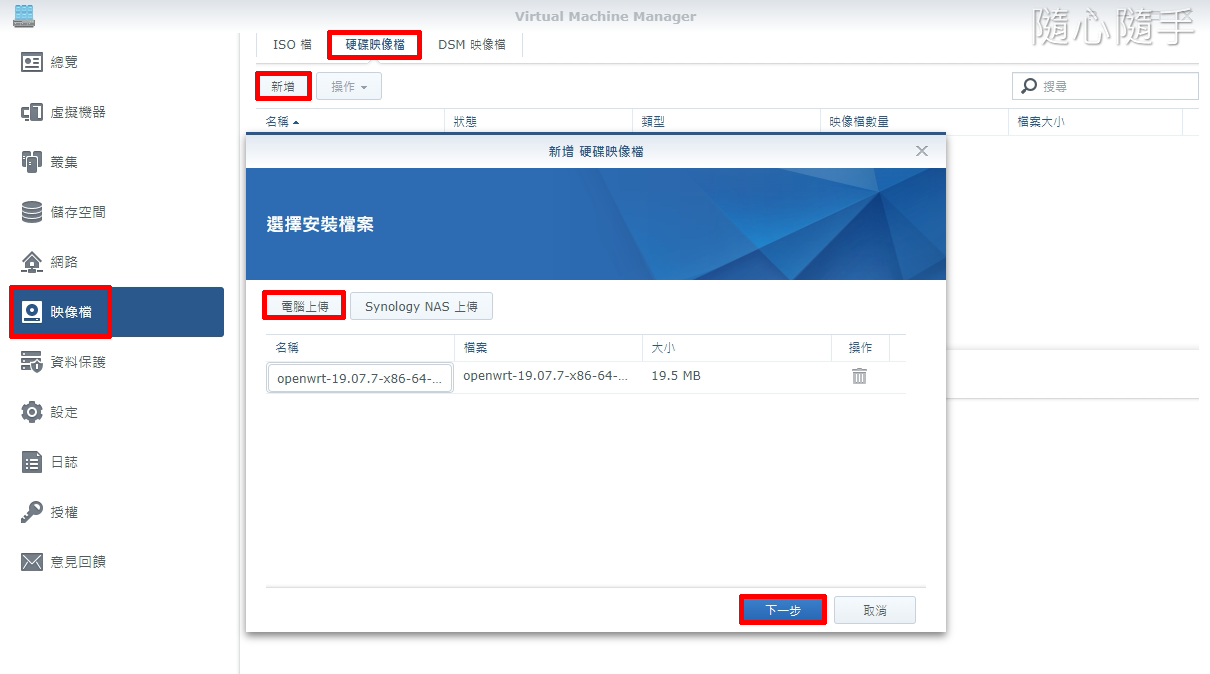
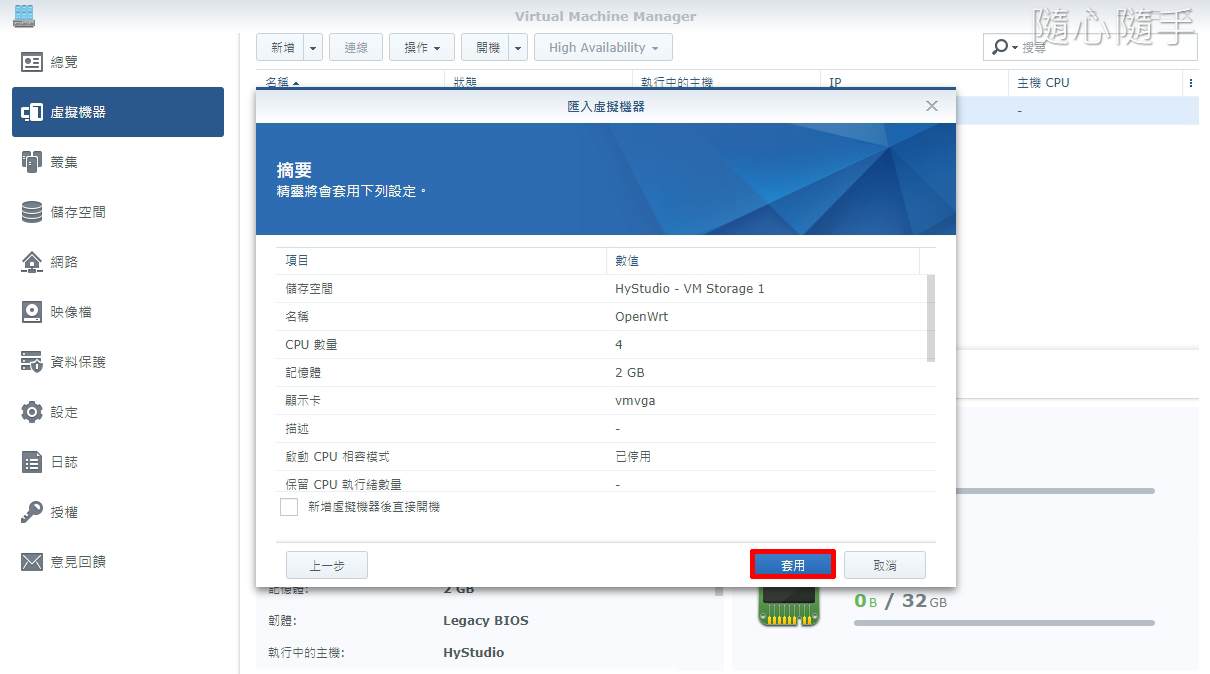
套用。
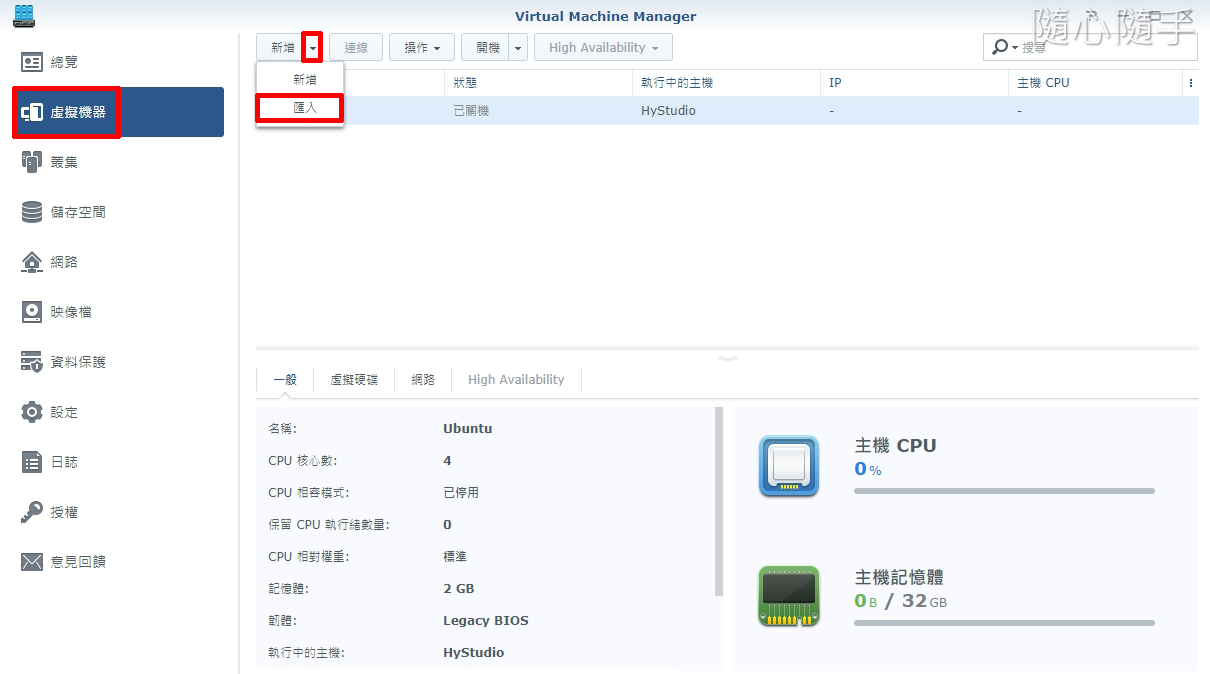
虛擬機器\▼\匯入。
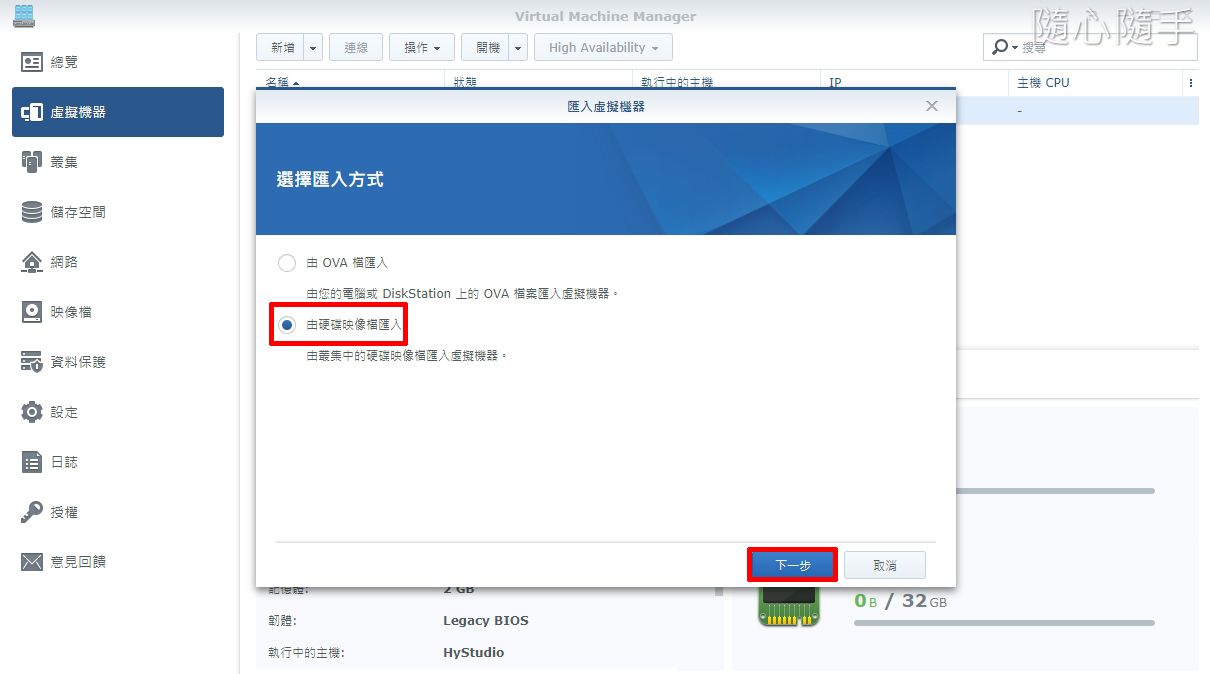
由硬碟映像檔匯入\下一步。
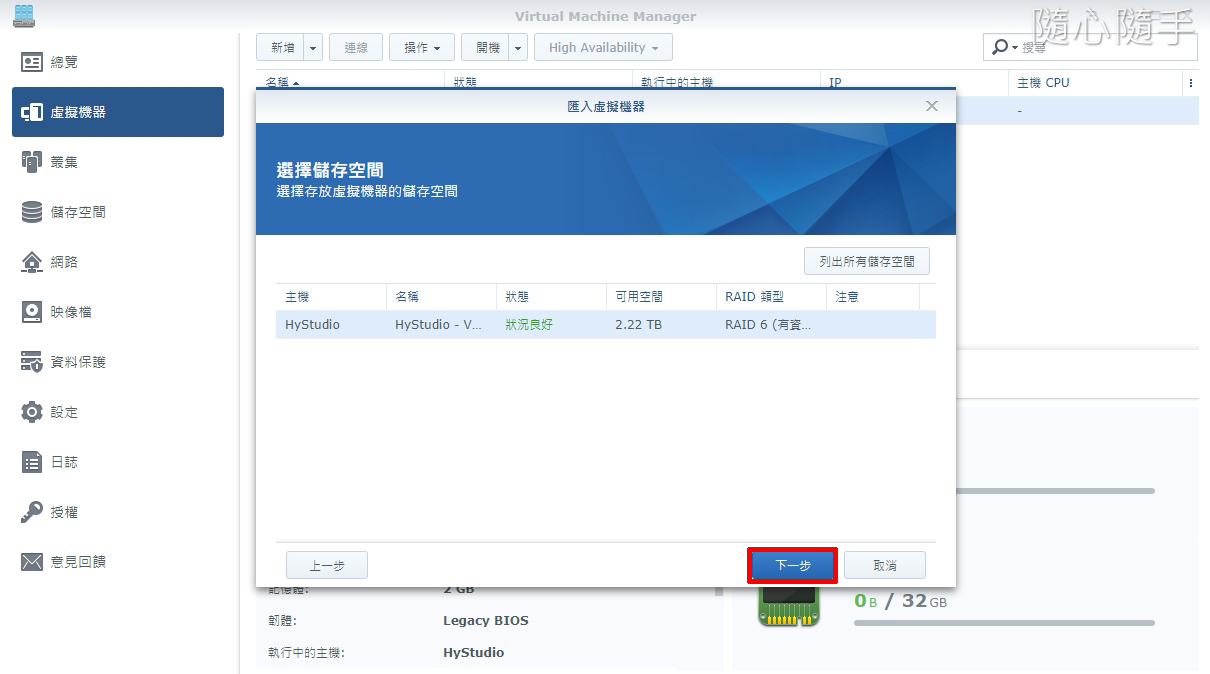
下一步。
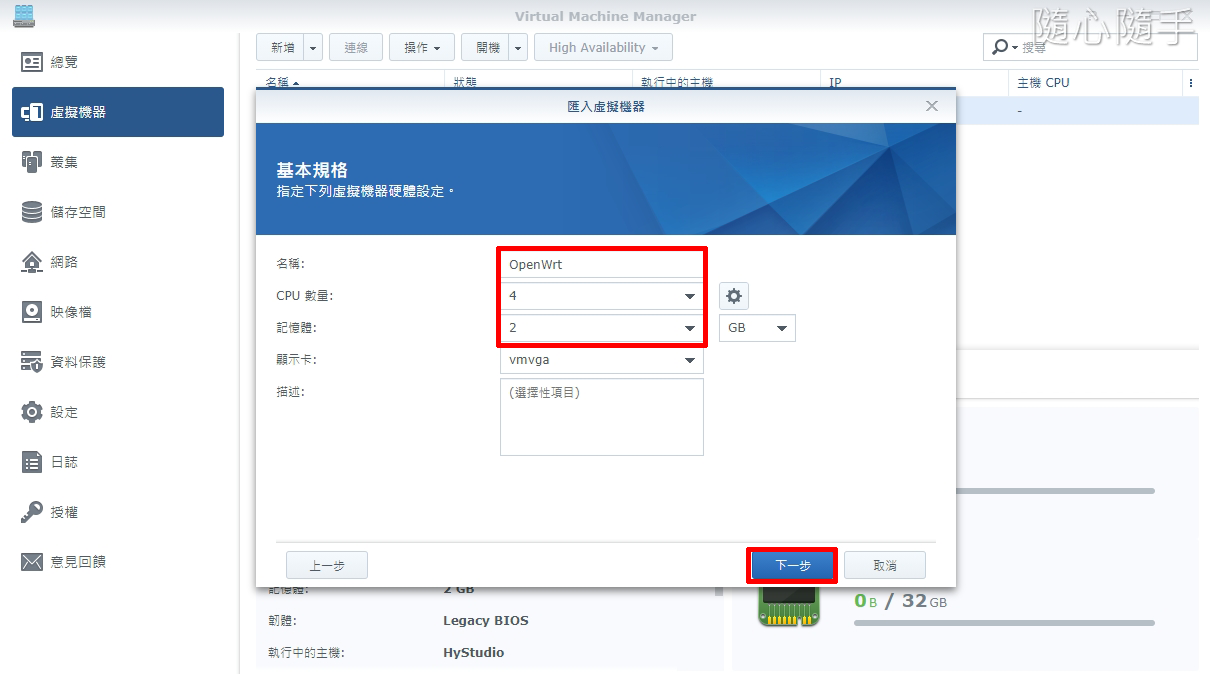
名稱\ CPU 數量\記憶體\下一步。
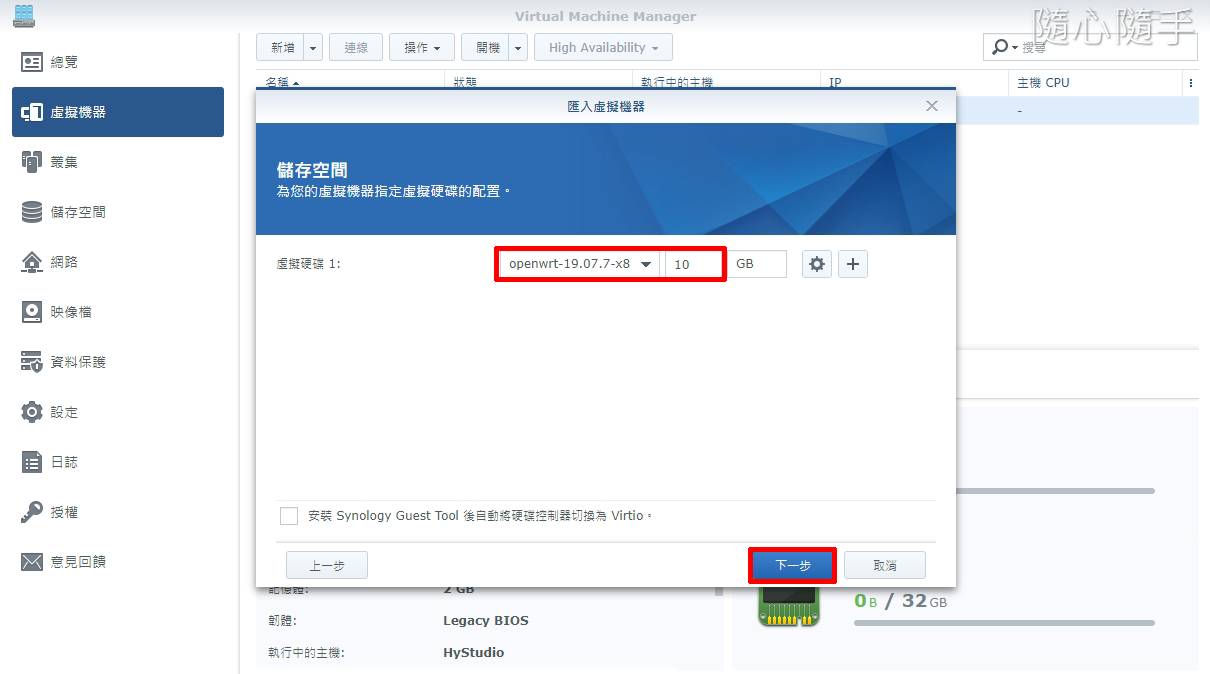
選取 img 映像檔\下一步。
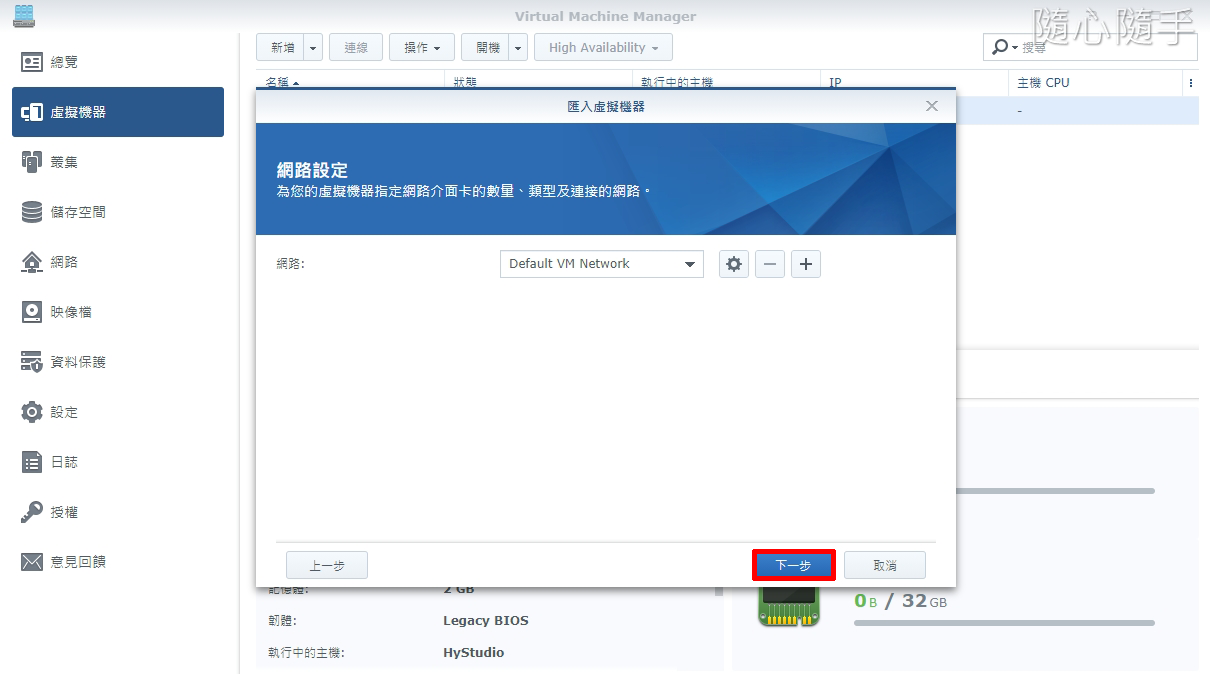
下一步。
下一步。

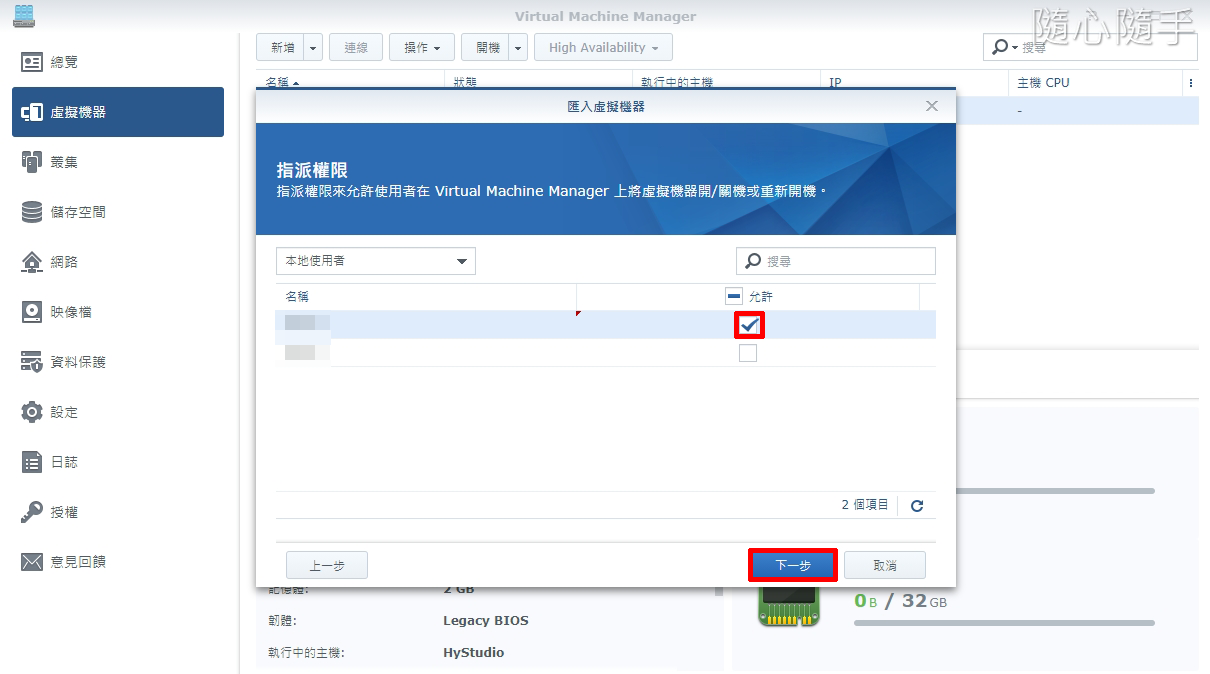
勾選權限\下一步。
套用。
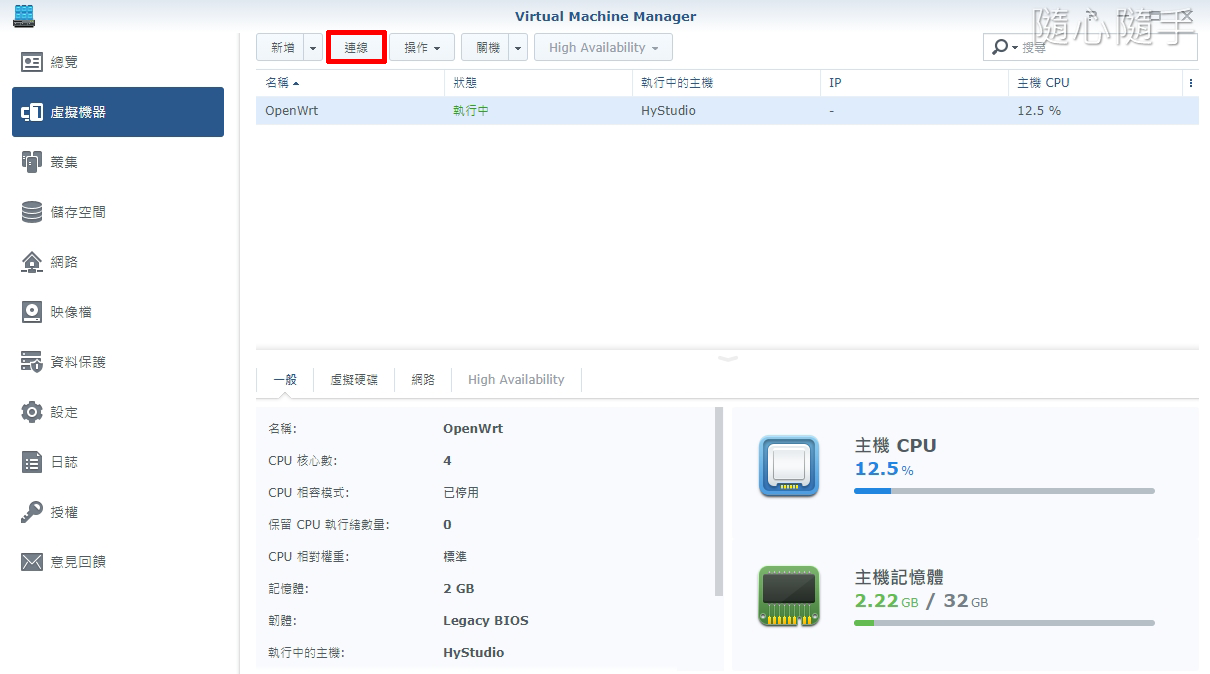
OpenWrt \開機。

連線。
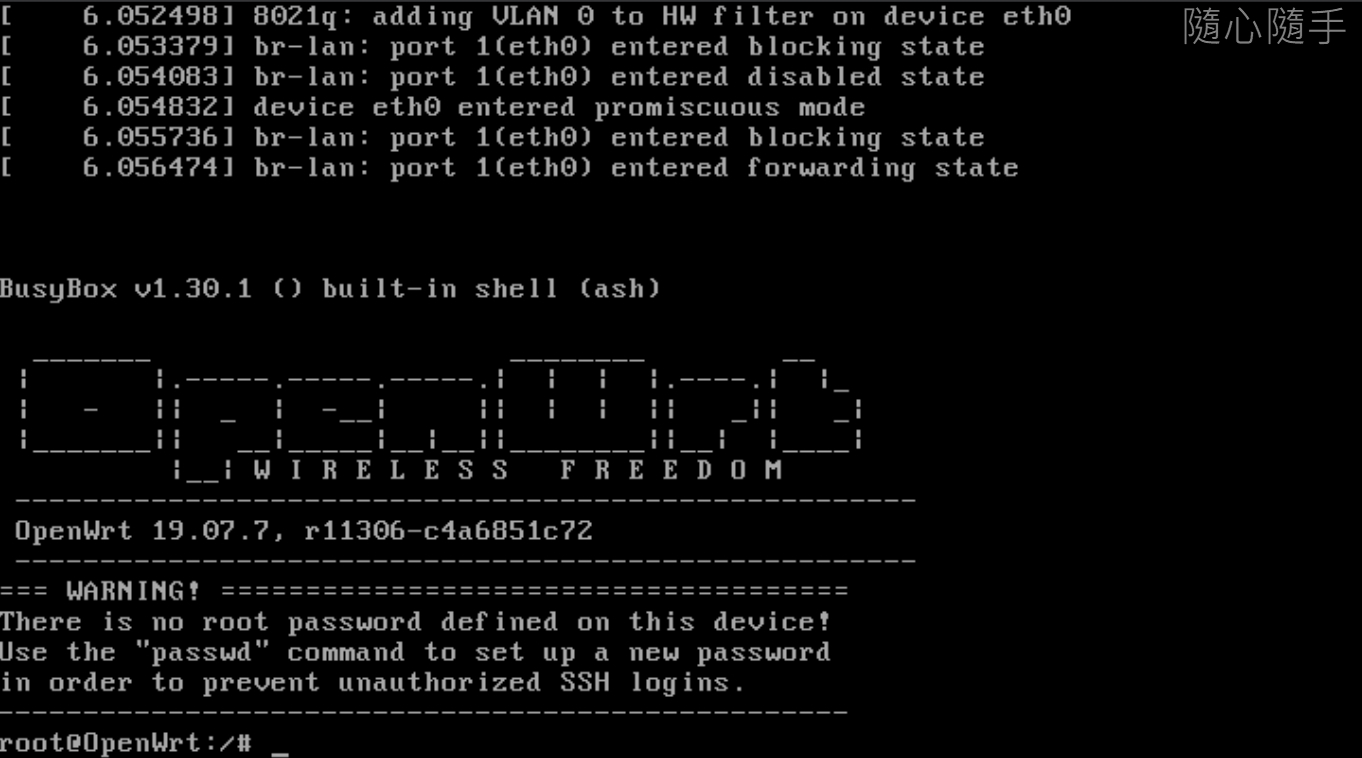
Enter 。
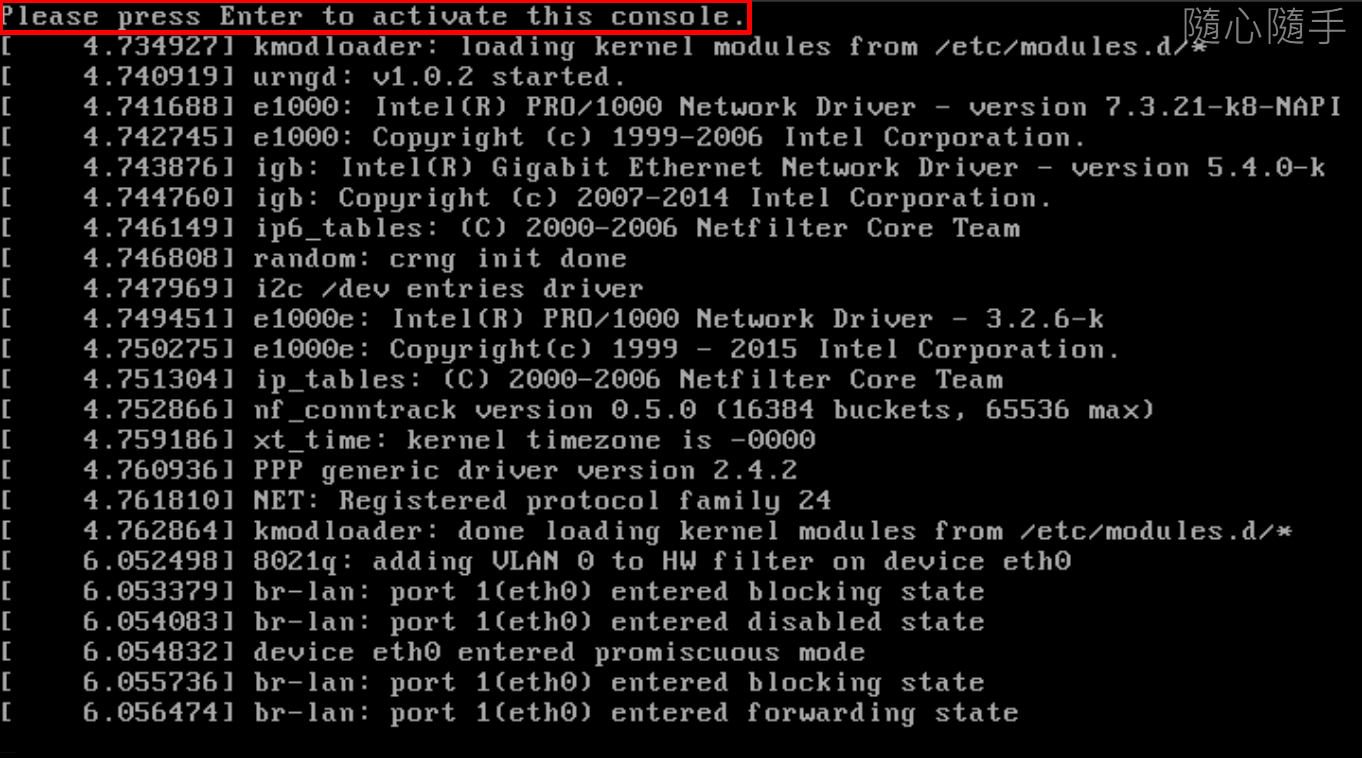
OpenWrt 開機完成。
OpenWrt 路由器 佈署
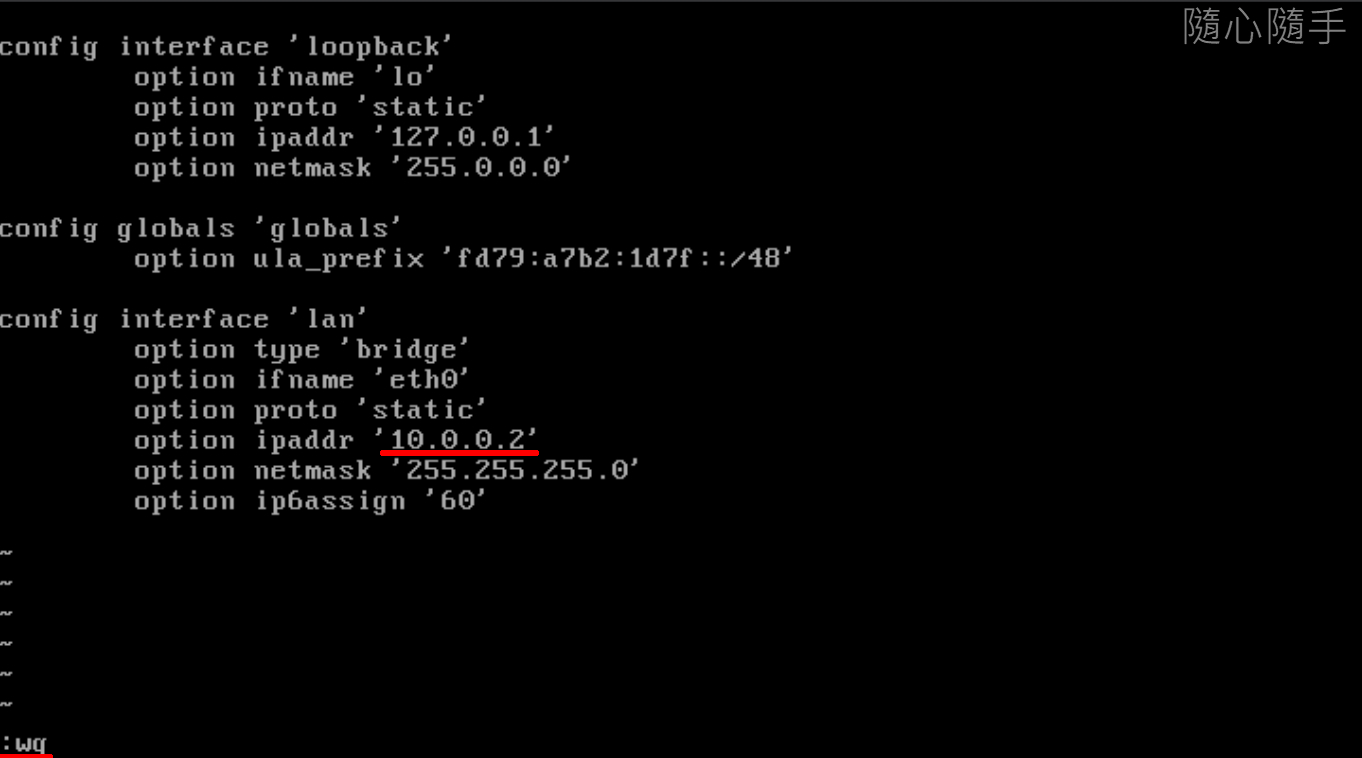
修改 OpenWrt IP 位置。
vi etc/config/network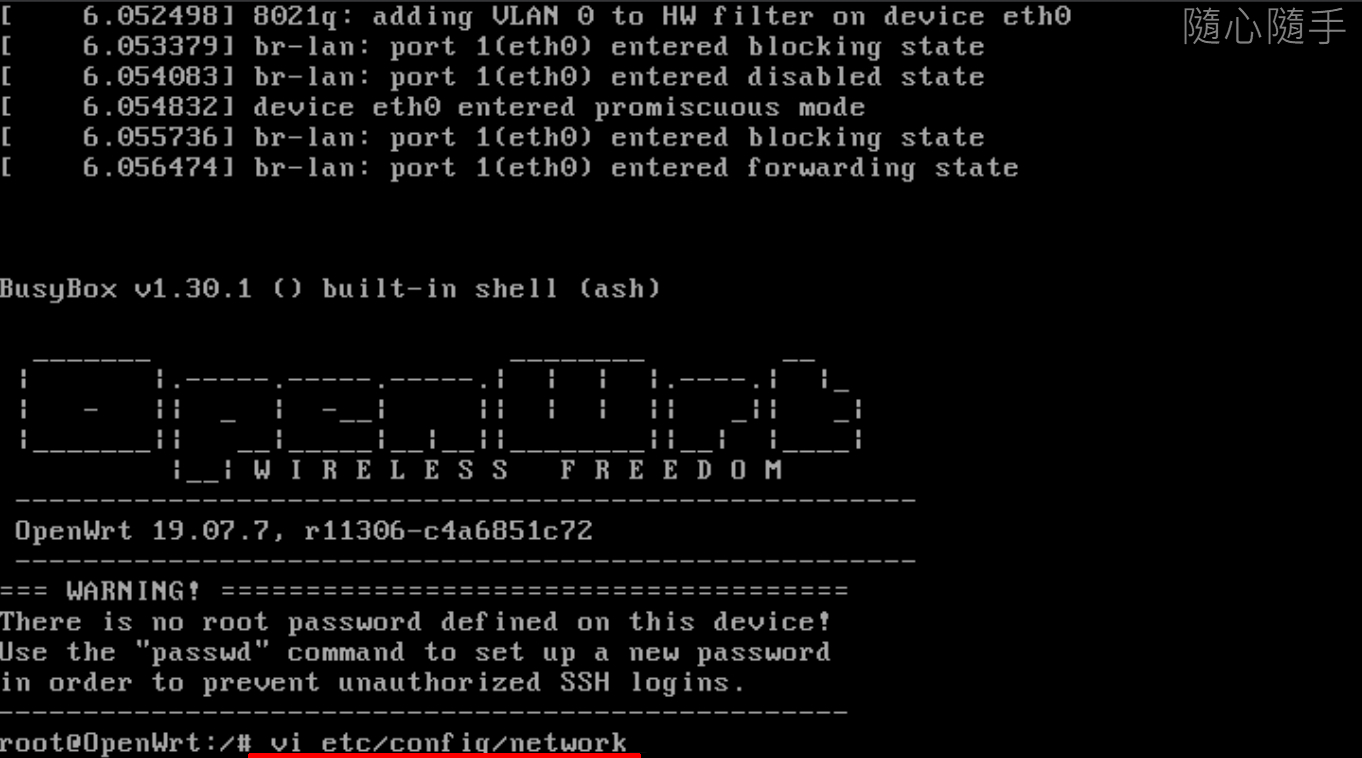
IP 位置與主路由器同網段。
I 編輯, ESC 結束編輯,:WQ 存檔。
修改 root 登入密碼,輸入兩次完成。
passwd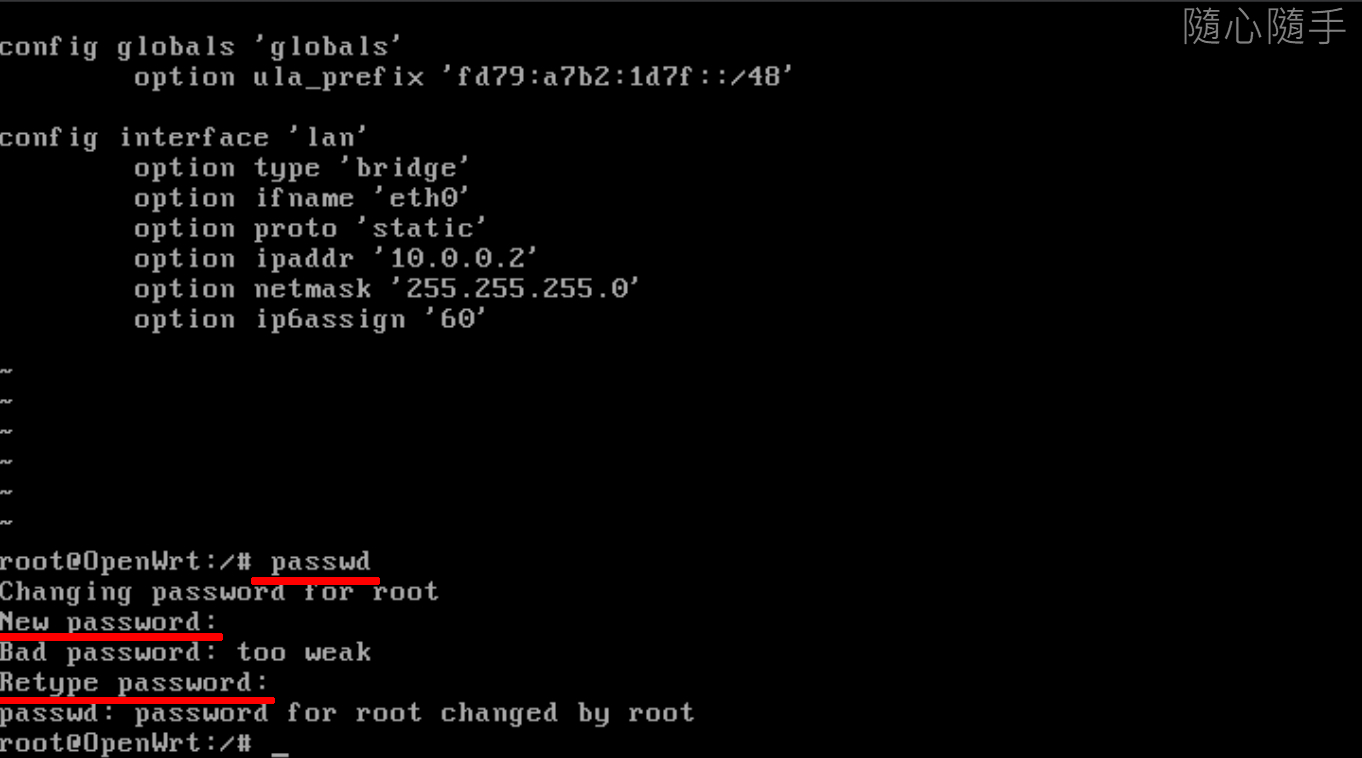
OpenWrt 重開機。
reboot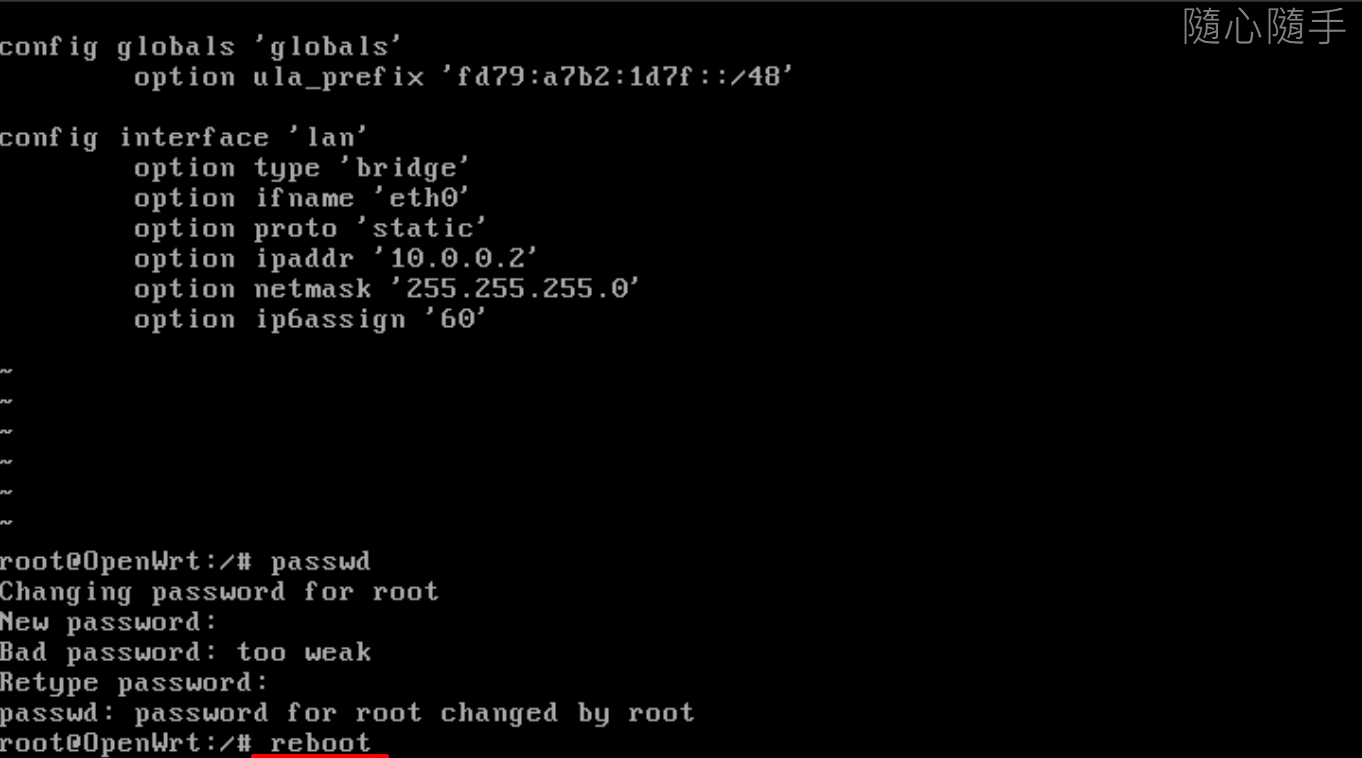
OpenWrt 設定 DNS 及網關
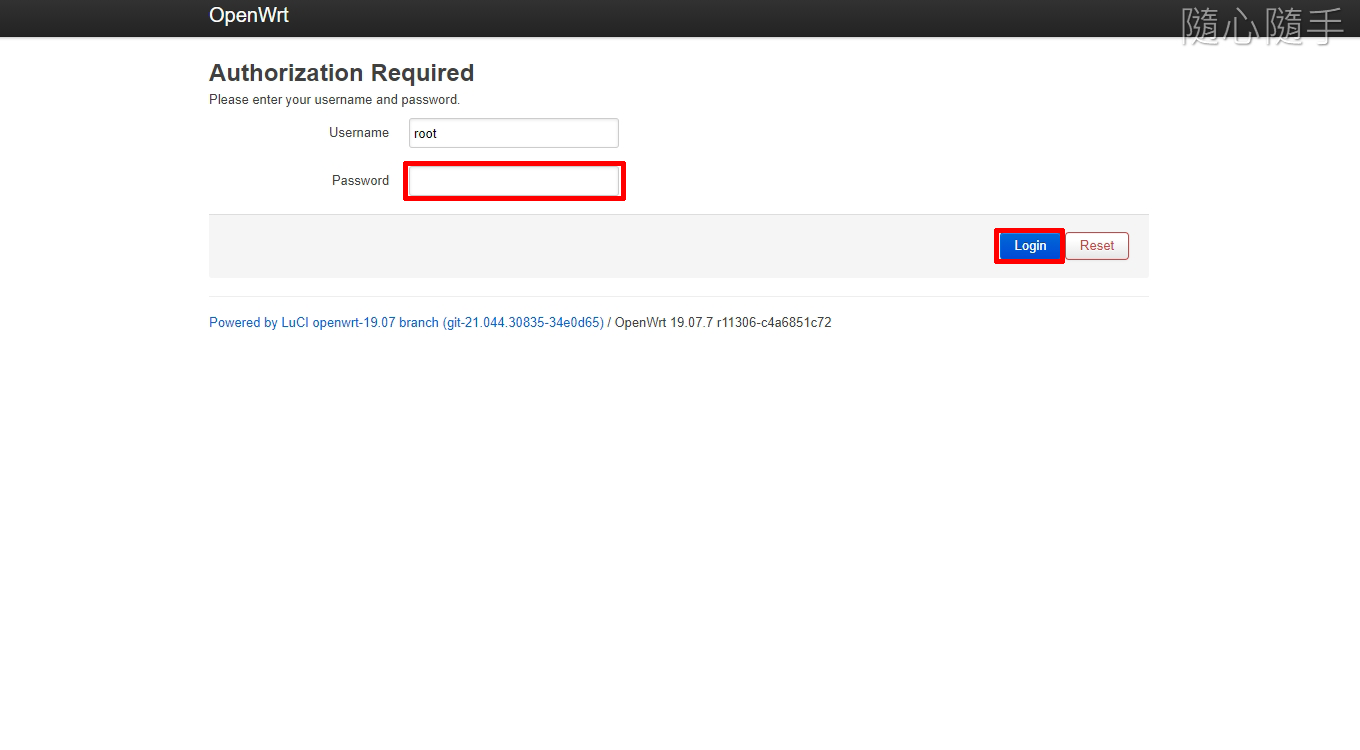
瀏覽器輸入剛設定的 IP 位置\ Password \ Login 。
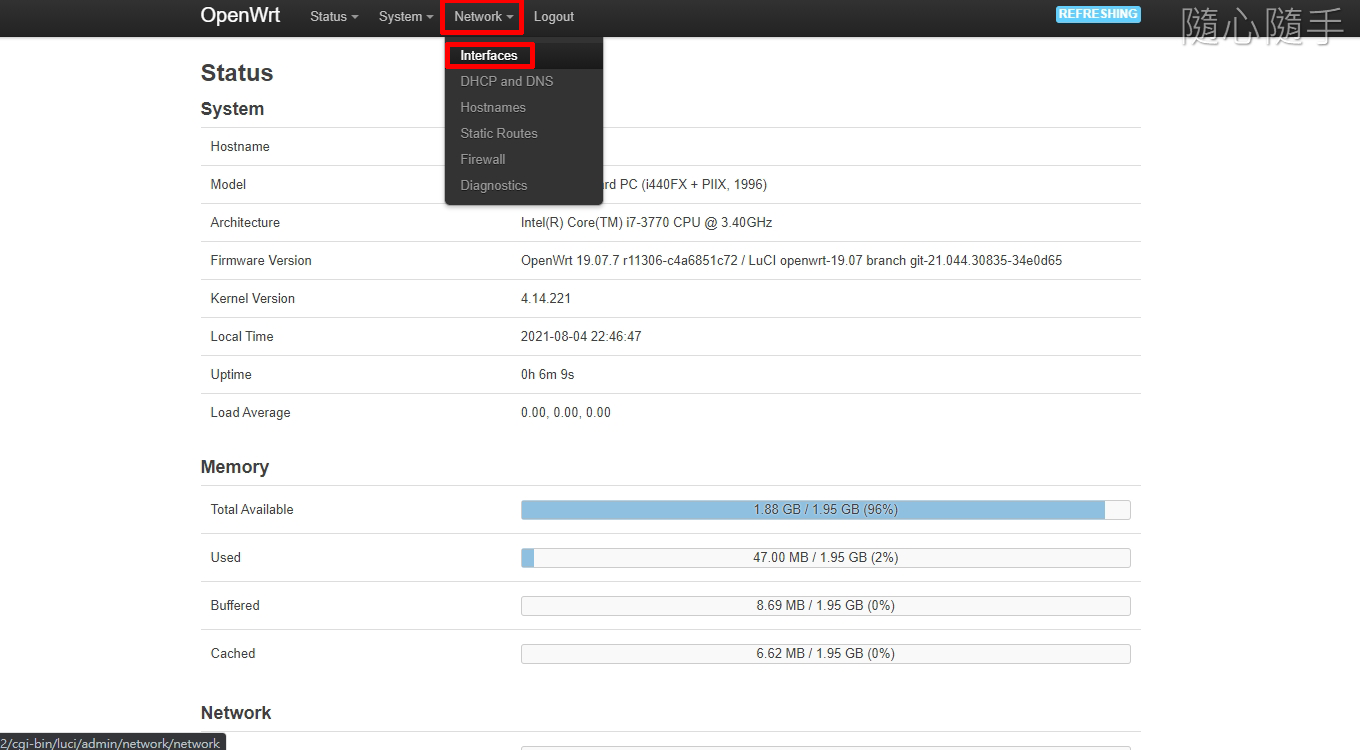
Network \ Interfaces 。
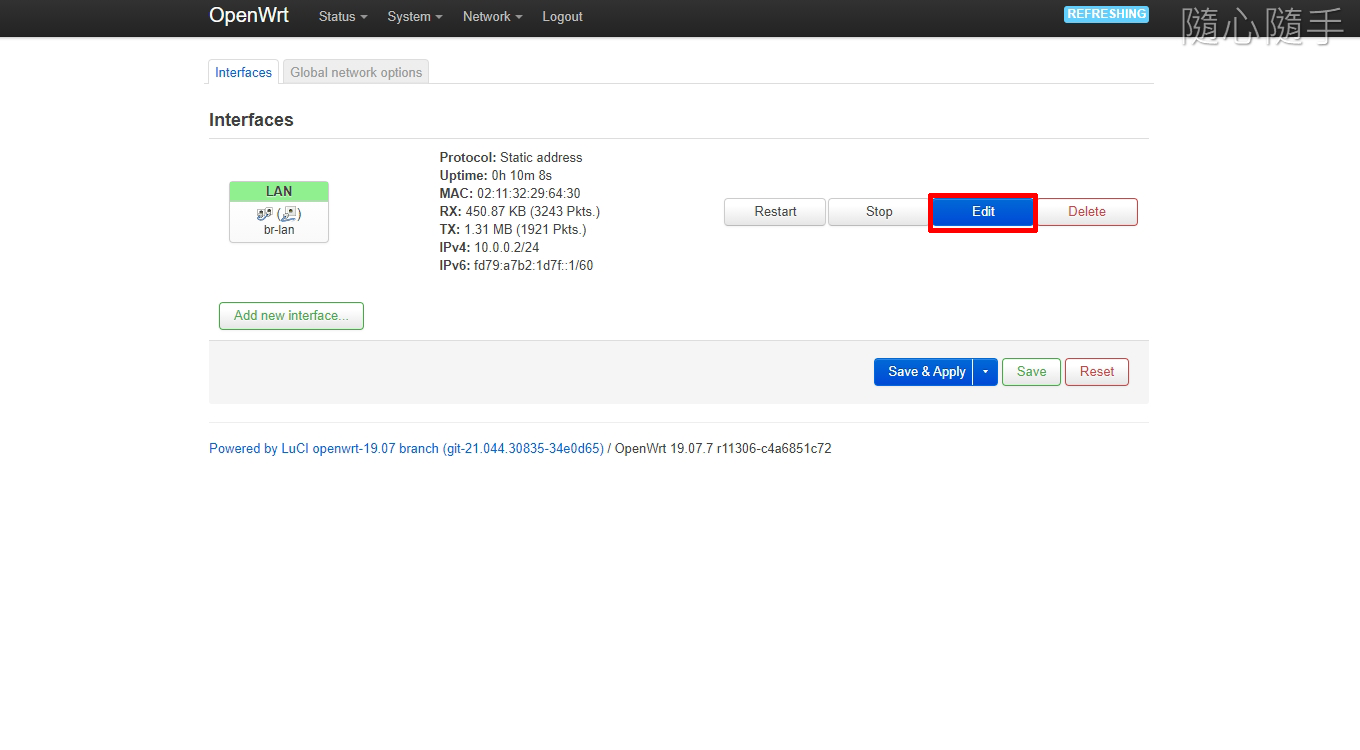
Edit。
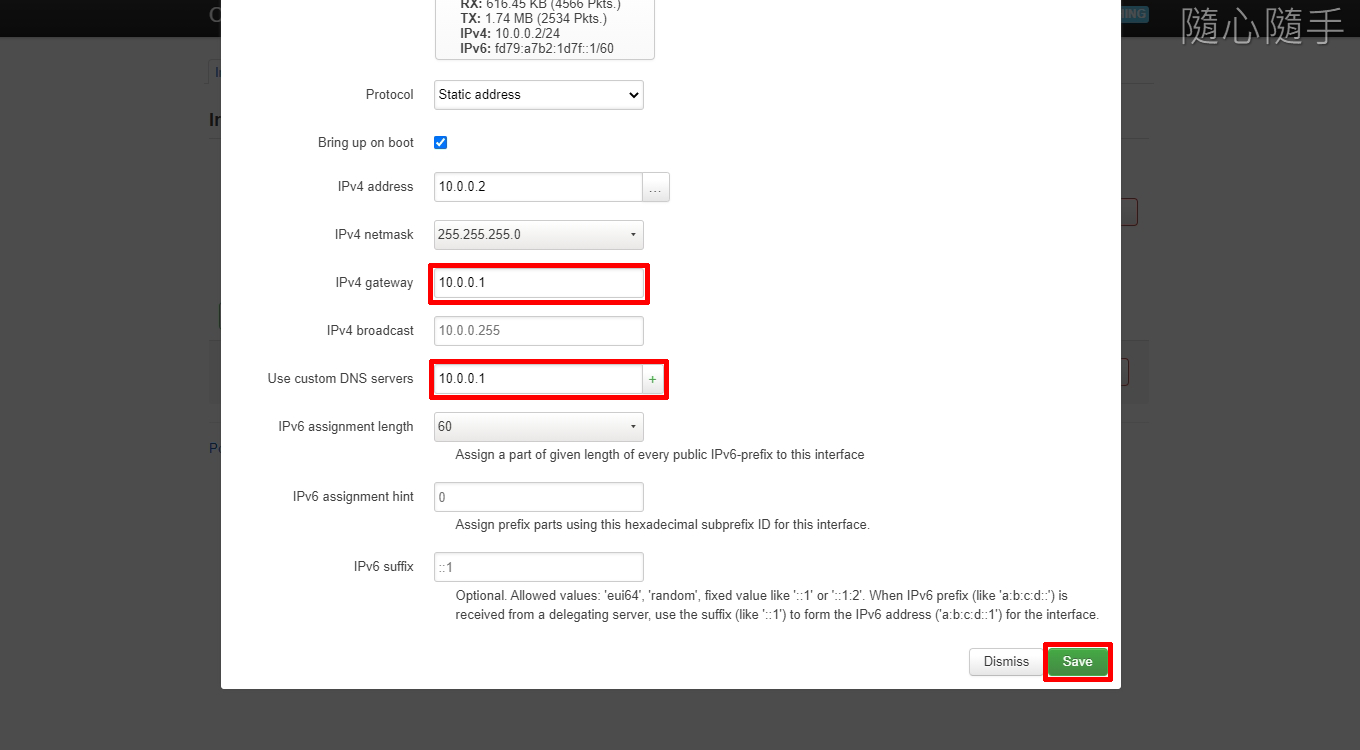
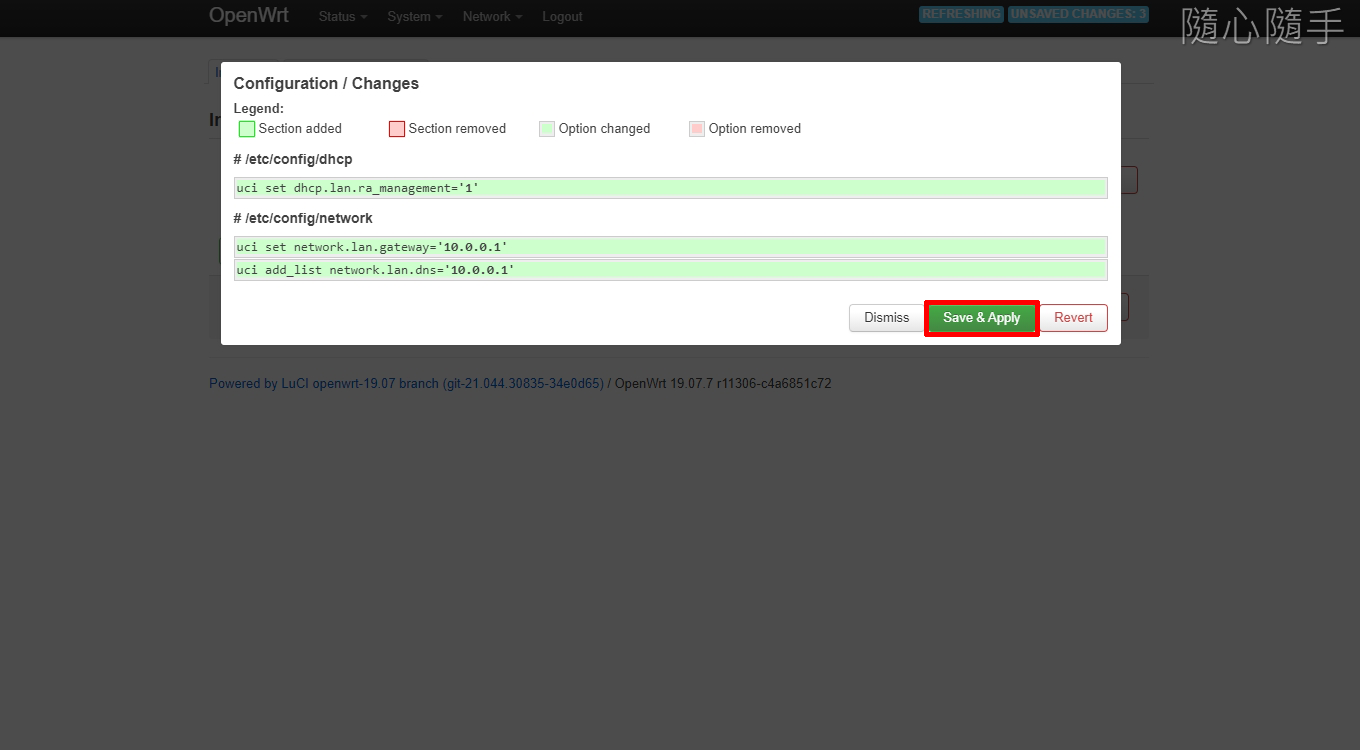
IPv4 gateway \ Use custom DNS servers \ Save 。
指向主路由器 IP 位置。
Interface has 3 pending changes 。
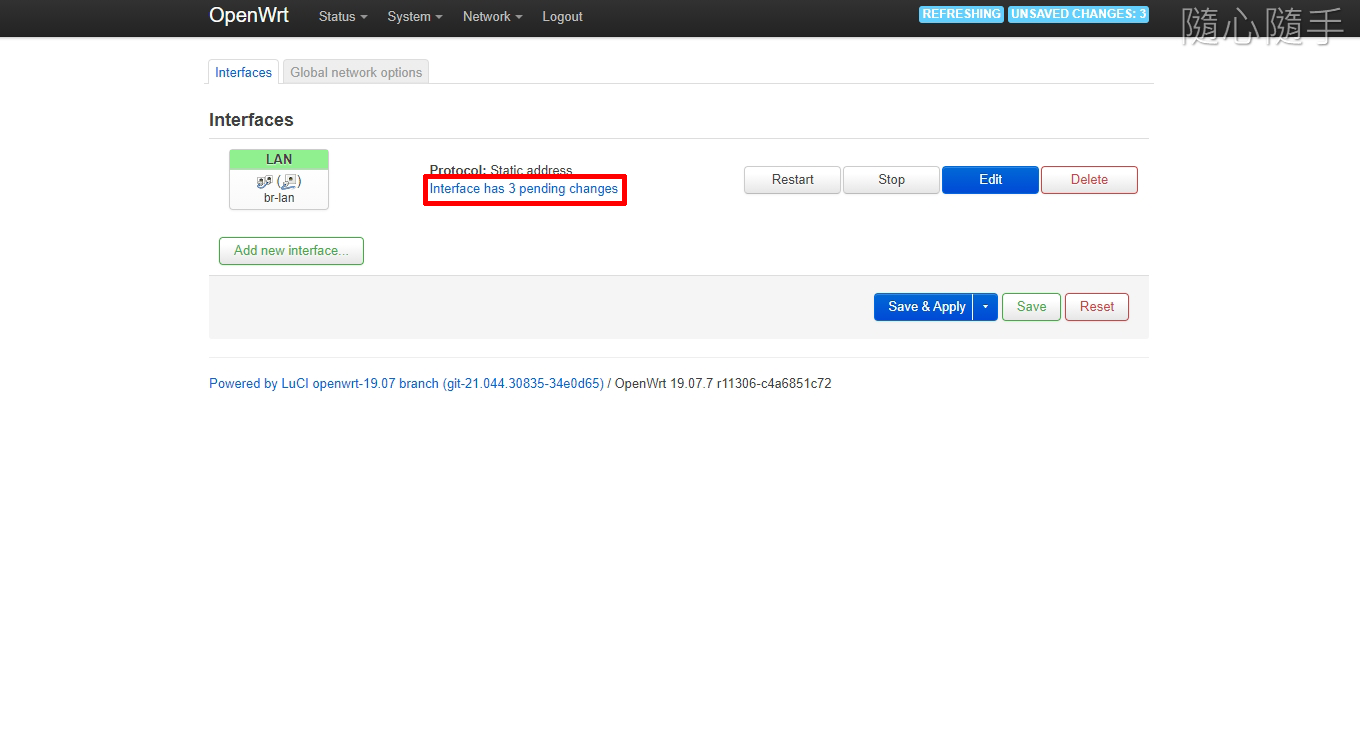
Save & Apply 。
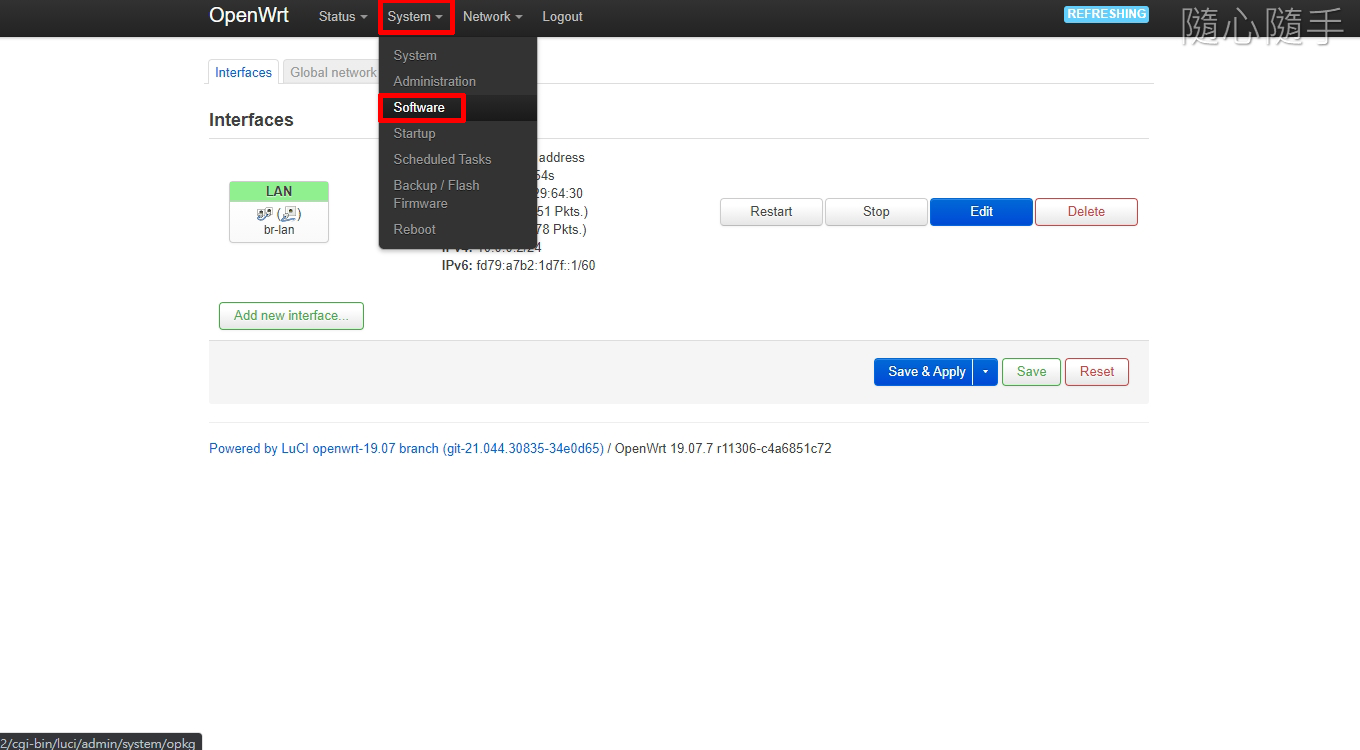
安裝繁體中文包
System \ Software 。
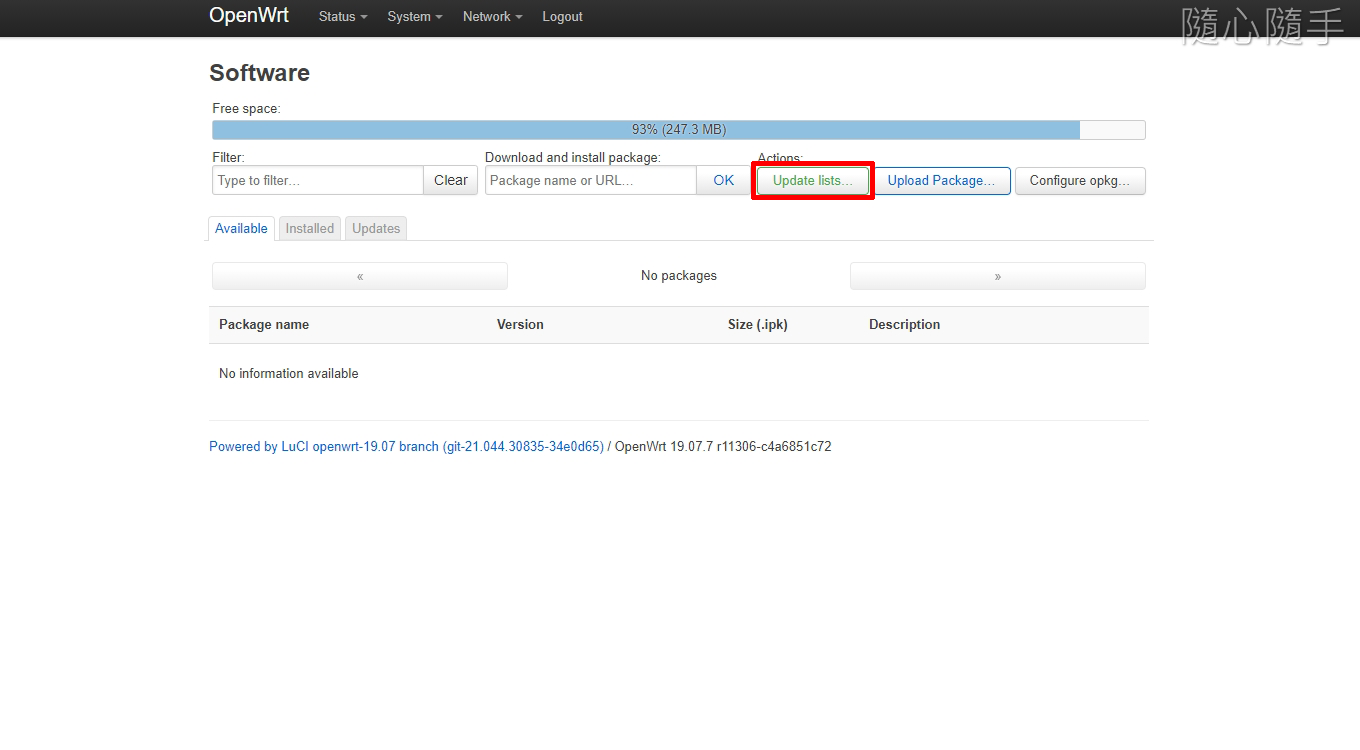
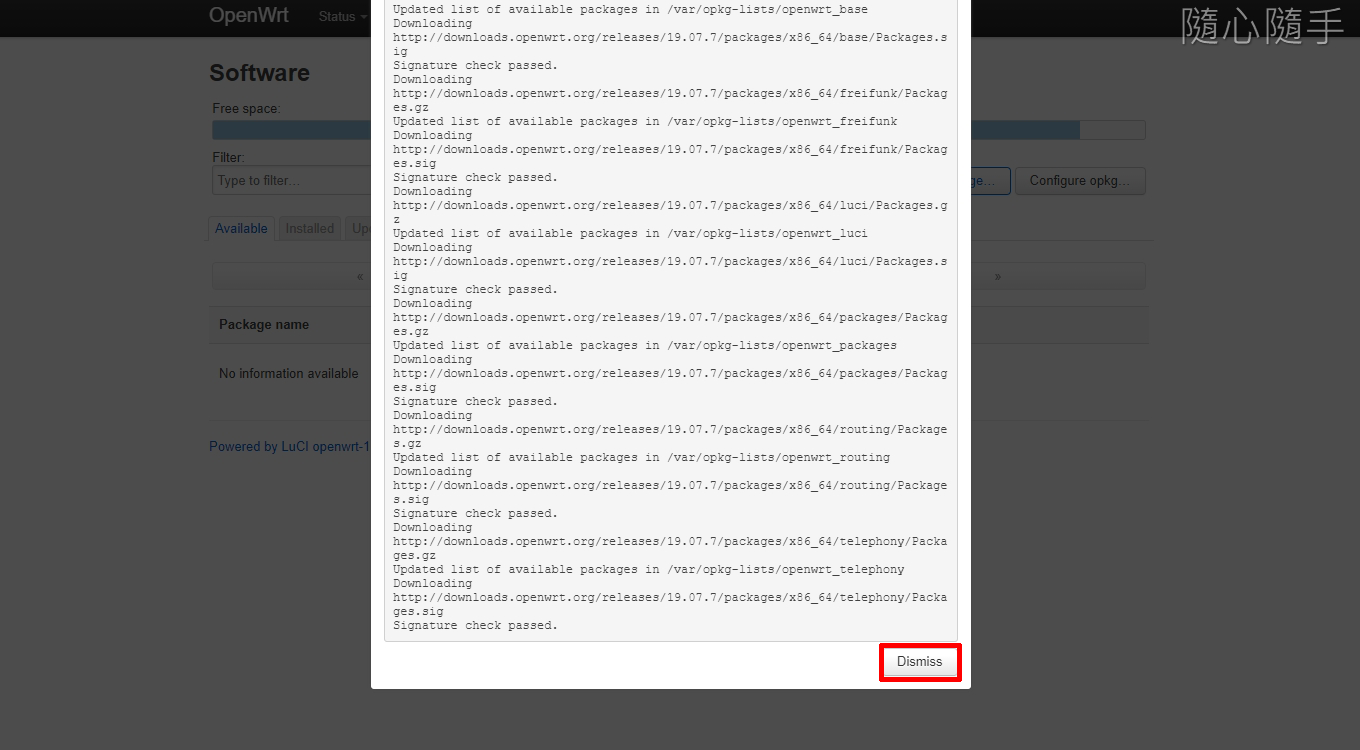
Update lists…。
Dismiss 。
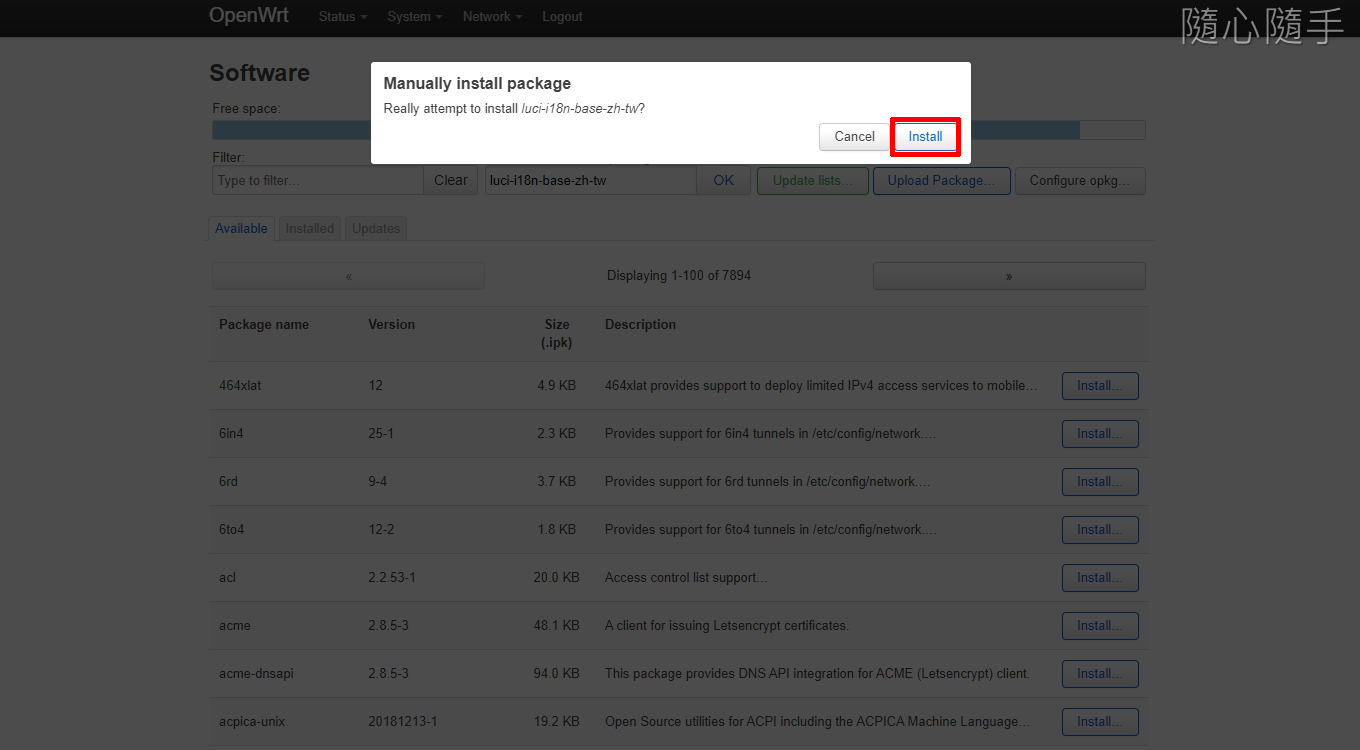
輸入 luci-i18n-base-zh-tw \ OK 。
luci-i18n-base-zh-tw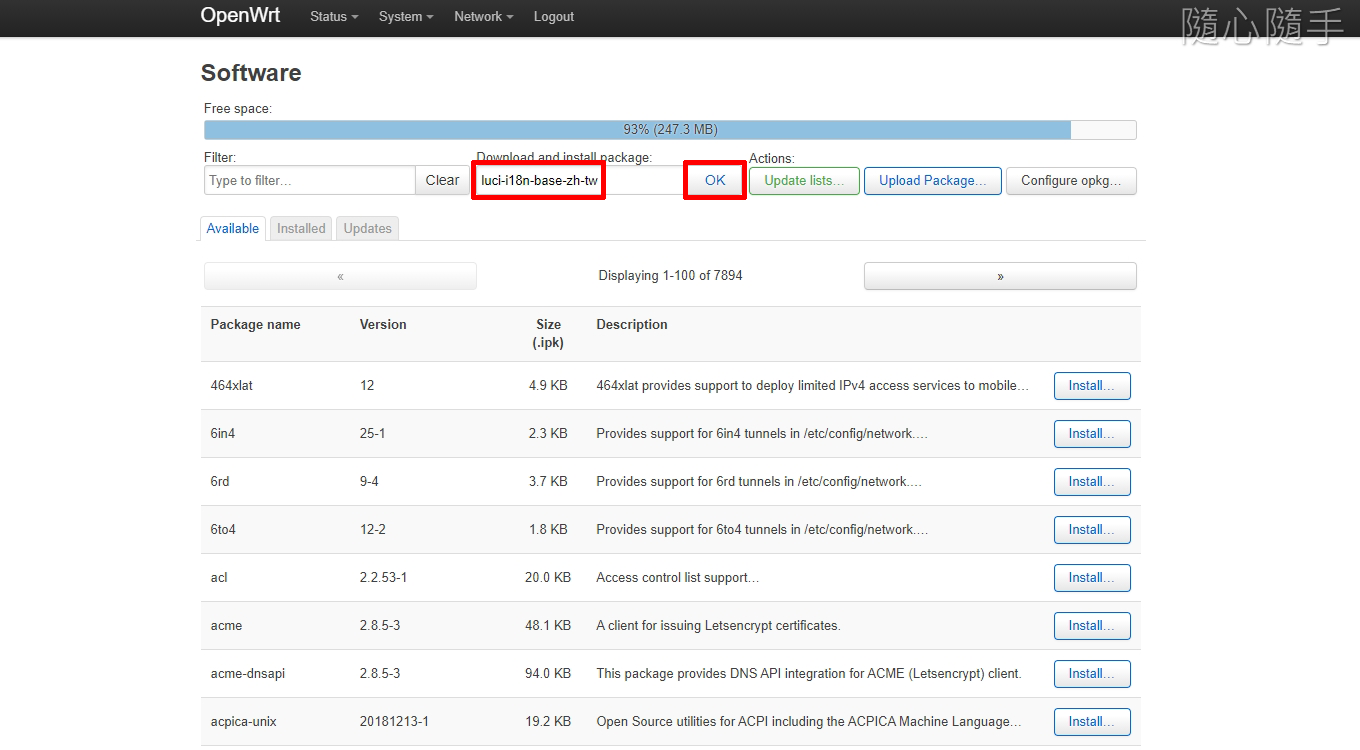
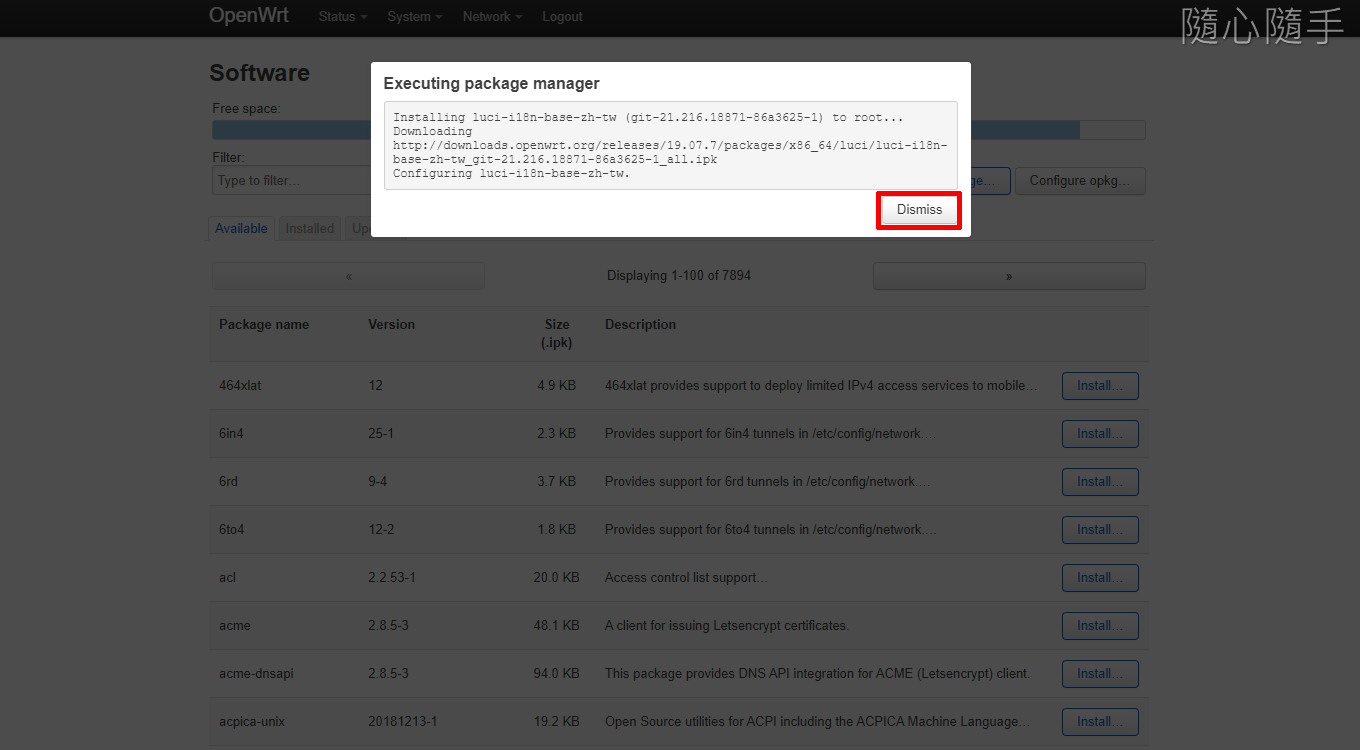
Install 。
Dismiss 。
Network \ Interfaces 。
介面自動切換繁體中文。
編輯。
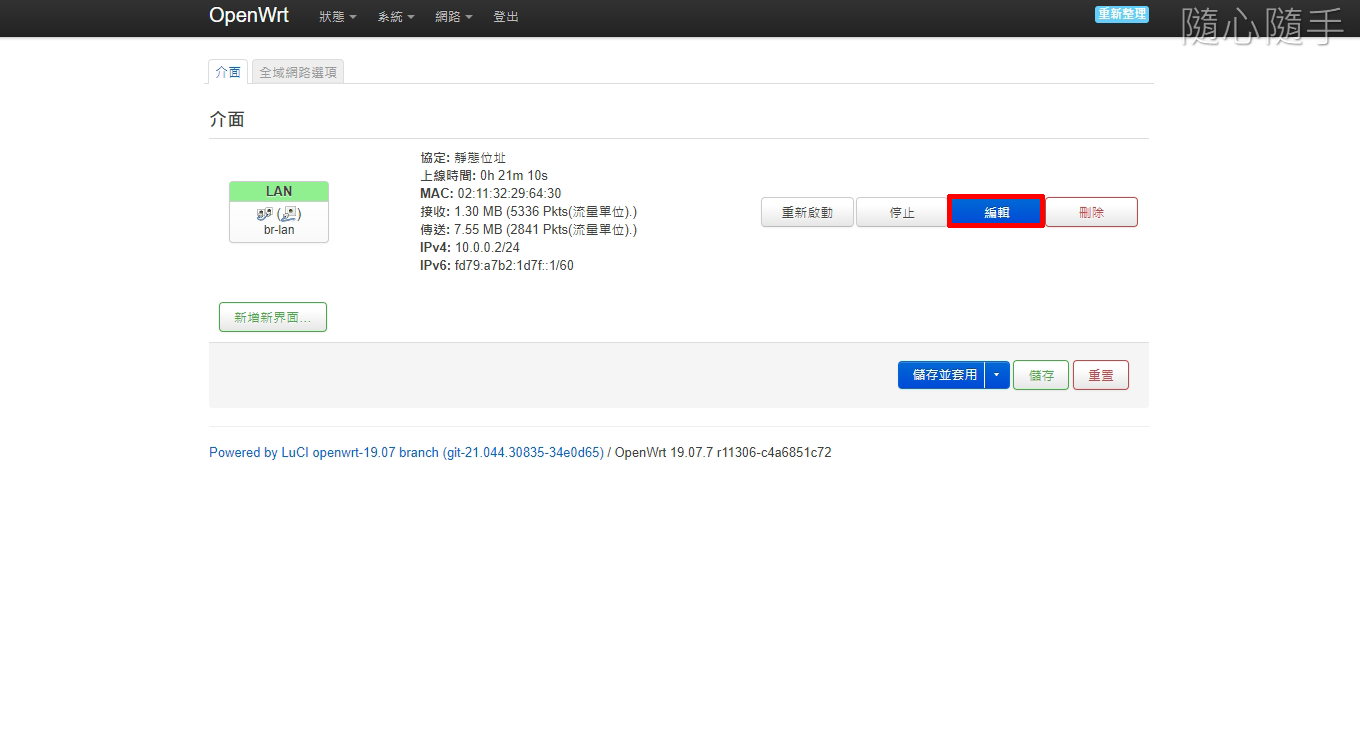
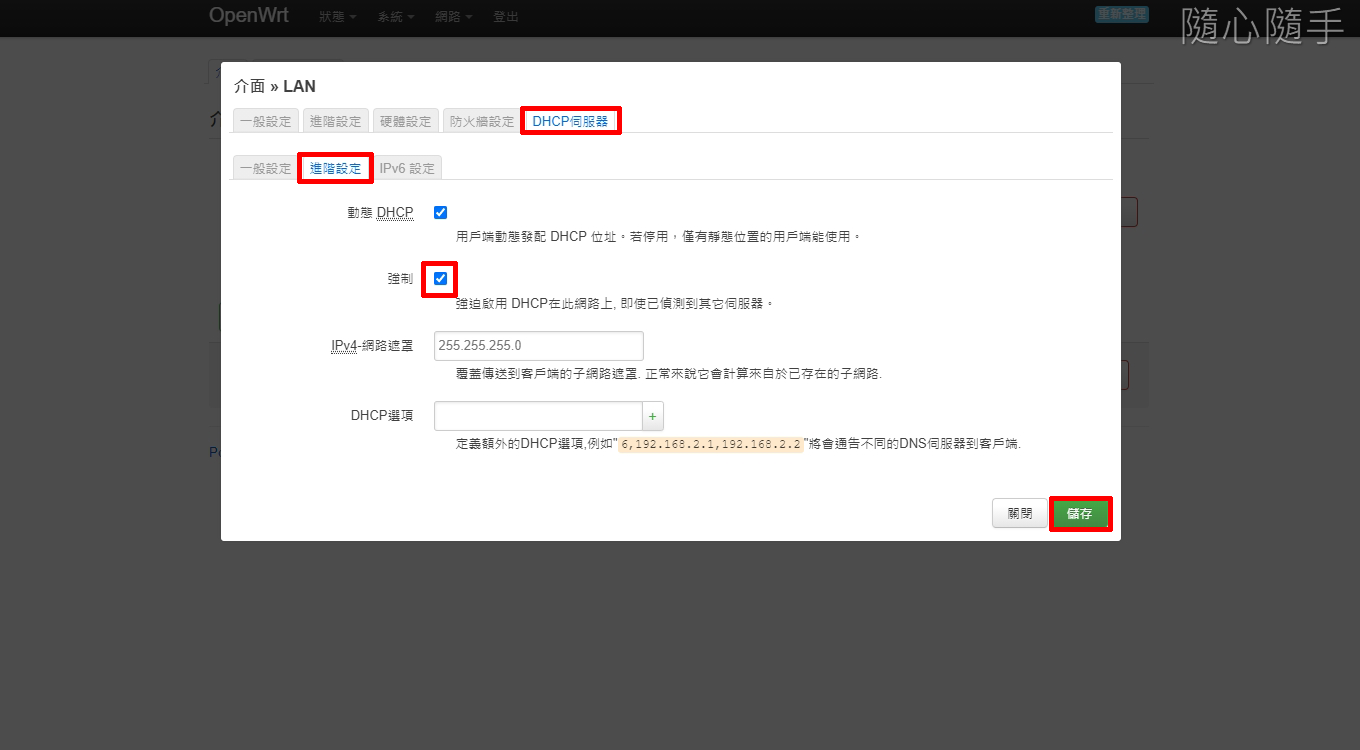
DHCP 伺服器\進階設定\強制\儲存。
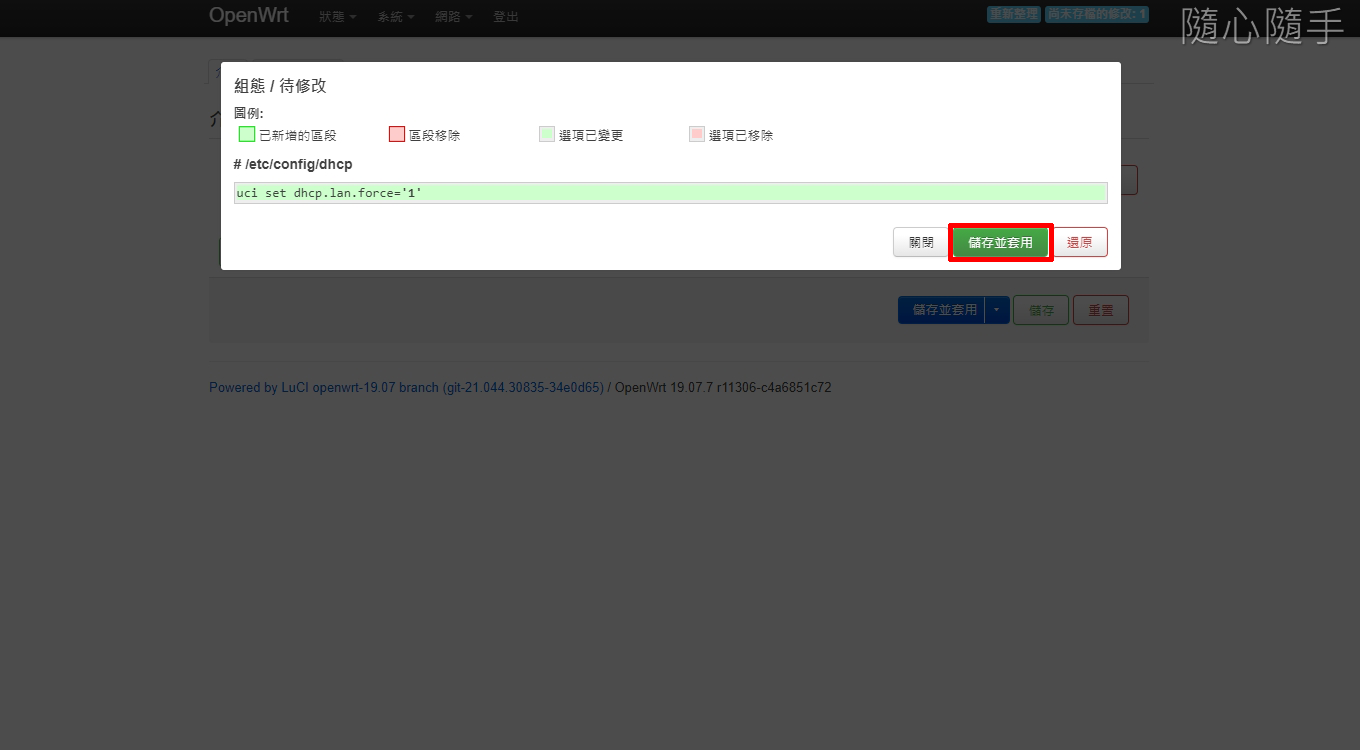
介面有 1 個待處理的變更。
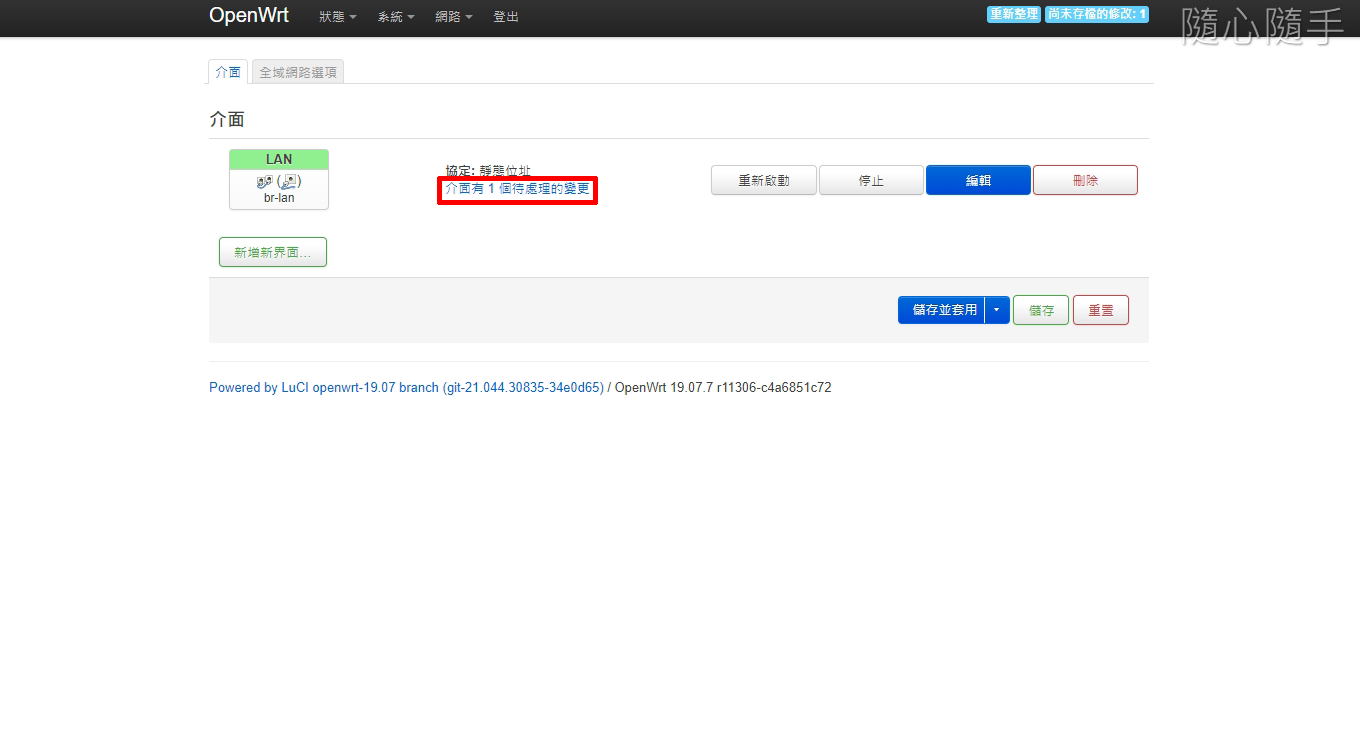
儲存並套用。
驗證旁路由器運作
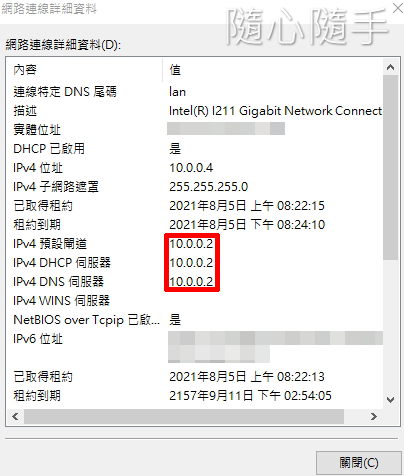
開啟 Windows 網路連線詳細資料, IPv4 DHCP 伺服器自動修改為 OpenWrt 位置,代表旁路由正常運作。
旁路由自動啟動
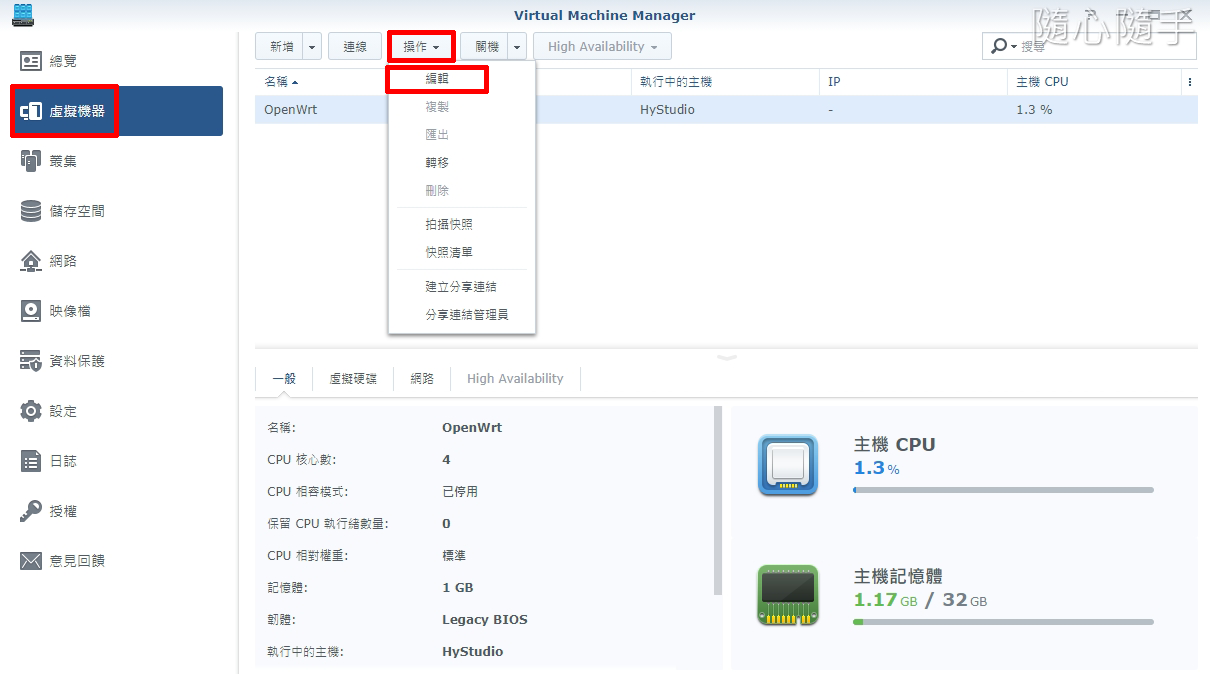
Virtual Machine Manager \虛擬機器\操作\編輯。
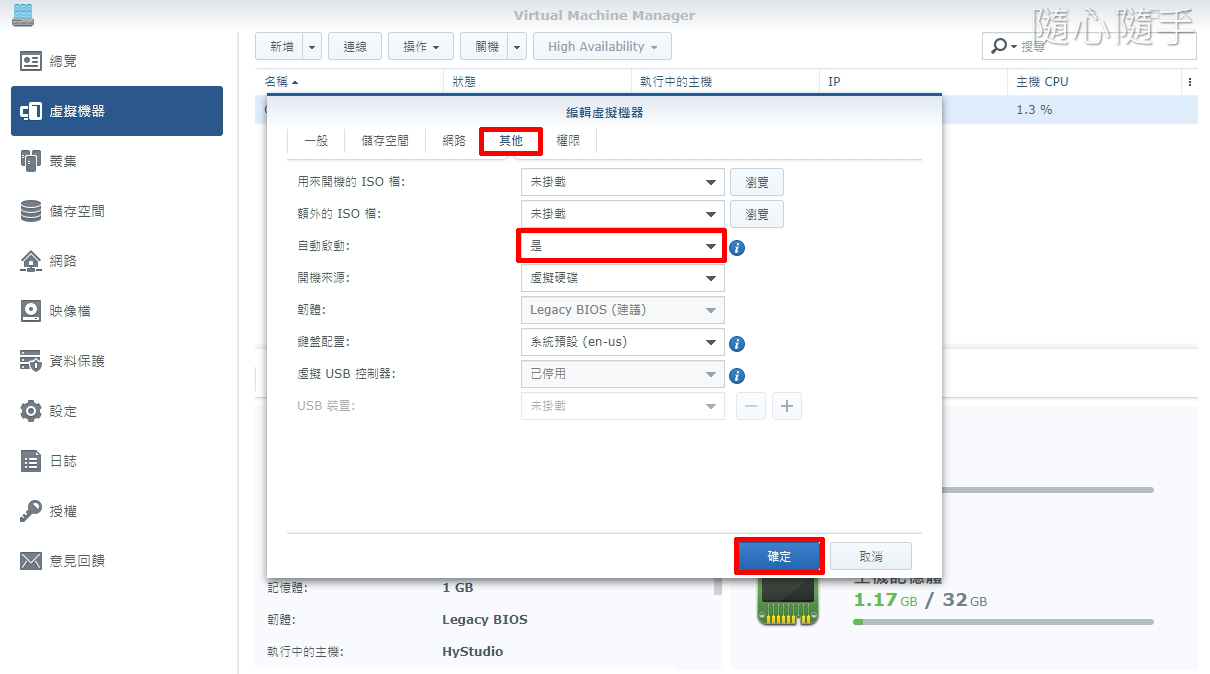
其他\自動啟動\確定。
防火牆規則
虛擬機如有配置 WAN 口,則不需新增防火牆規則。
網路\防火牆。
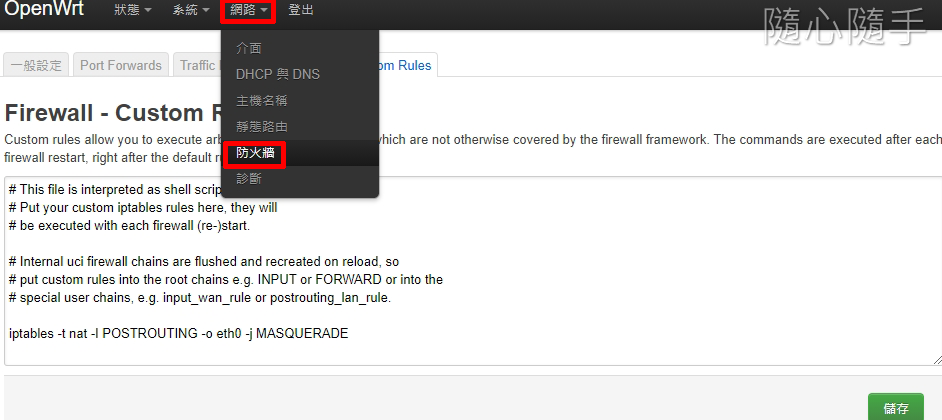
Custom Rules \新增規則。
iptables -t nat -I POSTROUTING -o eth0 -j MASQUERADE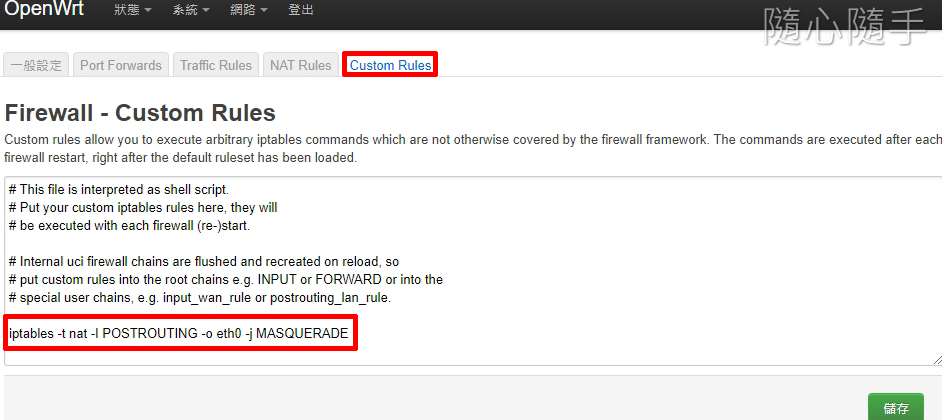
開心使用 OpenWrt 軟路由器!
提醒:可將主路由器 DHCP 關閉,完全使用旁路由器運作。